We already looked at the basics of the buttonhole stitch along with its functions and spoke about the confusion between the names “blanket stitch” and “buttonhole stitch”. Now, one of the remarkable characteristics of this stitch is that it has a TON of variations. All of them are worth attention but mentioning every single one would make this post super long. So for the starts, I decided to stop at the three most popular variations: closed buttonhole stitch, crossed buttonhole stitch and knotted buttonhole stitch.
CLOSED BUTTONHOLE STITCH
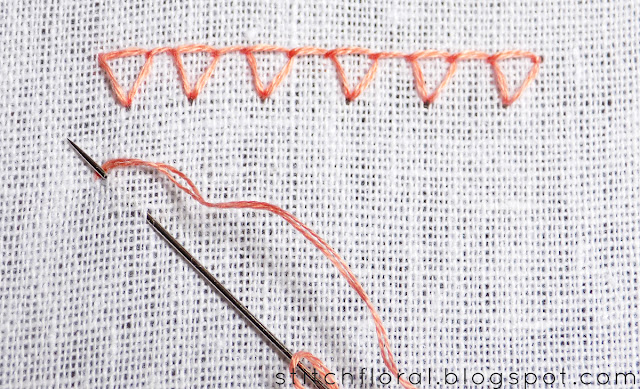
Bring your needle up and insert it back in the fabric below and to the right from the first point. The point where you insert the needle now will be the the lowest point of the triangle. The needle should emerge on top of the fabric above this point and again to the right – this will be the right corner of the triangle.
Now insert the needle in the fabric again in the point below and to the right and bring it up to the front side of the fabric somewhere near the previous point where it emerged.
Continue repeating the first two steps.
When you finish the line, make a running stitch to anchor the last loop.
You can also make a straight stitch in the very beginning of the line to close the first triangle.
CROSSED BUTTONHOLE STITCH
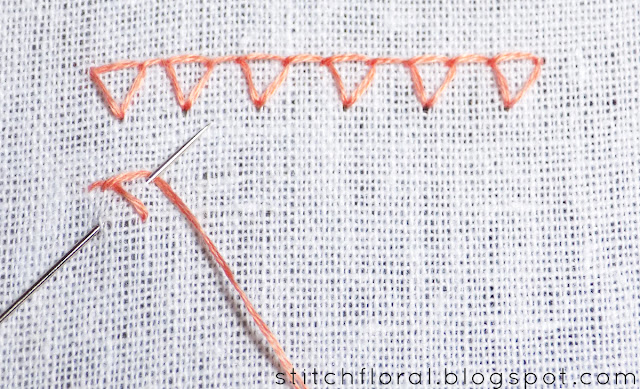
Bring the needle up and insert it in the point below and to the right. Next, bring it through the fabric at the point near the first one.
Now, insert the needle to the back of the fabric right under the point where it previously emerged and bring it up again right above the point where it was inserted in the previous step. It is important that these points are directly opposite to each other, so that the crosses would have even sides.
Continue repeating the first two steps.
In the end of the line anchor the last loop with a small straight stitch.
KNOTTED BUTTONHOLE STITCH
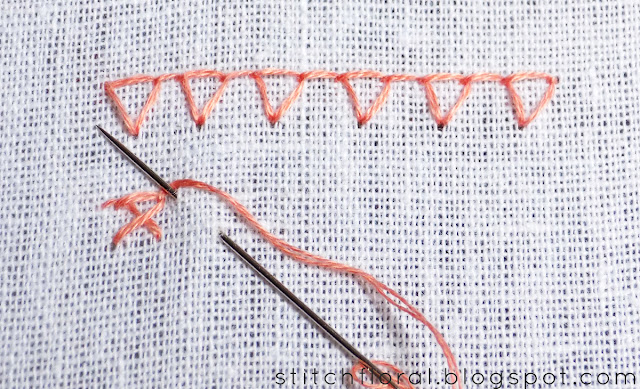
I do this stitch using two wraps for the knot, like for the french knot, but it can be executed with one wrap of thread around the needle.
Bring the needle up through the fabric, wrap the thread around it and insert it below and to the right from the previous point. The next point where it emerges must be perpendicular to where it was inserted.
If your thread is too loose, gently pull the working end of it until you are satisfied with the tension. But don't overdo it, because if the wraps are too tight it will be difficult to pull the needle through. It is better to use Milliners needle.
Pull the needle through and continue the same way.
So here are the three variations of buttonhole stitch. There are waaay way more (like the buttonhole edging with bullion picot). As for the next lesson, we are going to see how buttonhole stitch can be used for filling the shapes. What a versatile stitch, isn't it?!
See the rest of the lessons here:
See the rest of the lessons here:


No comments
Write what you think! ❤
Note: Only a member of this blog may post a comment.