How would you feel taking a bubble bath after a hard work day and then having someone stroke your head and caressing you in a gentle way? Relaxed? Fresh? Like new?
That's how your needlework would feel after being washed and ironed carefully.
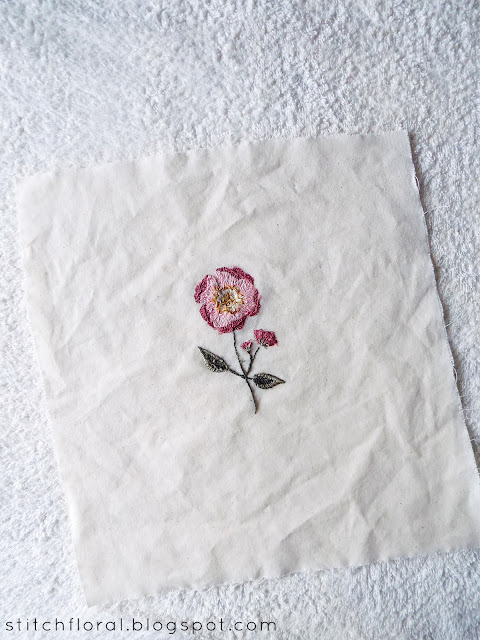
It is very rare for a pattern to be stitched overnight - usually, it takes days and maybe even months. During this time, your fabric becomes wrinkled and tired, and your embroidery needs cleaning from hand oils, dust and other minor dirt which can be not so obvious at the first glance but still spoil the work to an extent.
But washing hand embroidery brings with it another challenge – new creases, which need to be smoothed out. How do we do that, considering that any needlework is a fragile piece of art and a hot iron is a dangerous tool able to ruin it?
It's not that difficult actually. There are 4 main rules to ironing hand embroidery:
- make a “sandwich” with the needlework in the middle
- do NOT iron the face of your embroidery
- choose the right settings
- press and lift the iron, NOT move and push
Now, let's take a closer look, shall we?
Sandwich
When you are going to iron your hand embroidery, you need to prepare some extra stuff. Namely, you need a soft fluffy towel – flannel works great – and a clean sheet or pillowcase. We put the flannel pad on the ironing surface, put the needlework face down and cover it with a clean piece of cotton/linen fabric (a bed sheet, for example).
This is what "sandwich" stands for. Soft pad + needlework + covering fabric.
Why do we need this?
As I said, embroidered works are fragile, and we don't want to ruin them. While fabric creases might be pretty hard to smoothen out and require a good amount of effort to work them out.
If we were to iron right directly the surface of embroidery, we would crush the stitches, it would lose its dimension, not talking about how the heat could damage the thread.
That's why we use a cushioning. We lay a soft towel on the ironing board and put the needlework face down on it. The cushioning helps preserve the dimension of embroidery. Especially raised stitches like french and colonial knots, bullion stitches and others, which get buried in the flannel and soft material doesn't let them flatten.
A covering fabric, in its turn, protects the thread from the heat of an iron.
Face down
Always lay needlework face down when you iron it. It is necessary to protect the thread and stitches. Iron is not only hot, but it is rather heavy and flat. We don't want the hard work of our stitching hours to go to waste with an iron flattening and deforming all the stitches, do we?
Settings
When you choose the settings on your iron, you need to take into consideration two things: ground fabric and thread.
Most common choices are definitely cotton and linen for the ground fabric and cotton for the embroidery floss. If that can be applied to your finished needlework then you can choose either “cotton” or “linen” on the settings and you're good to go.
However, if your needlework is stitched on silk or using silk thread, it's better to lower the heat of the iron, because this material is pretty sensitive.
Press and lift
When you iron embroidery works try to avoid moving your iron in a pushing manner. These movements might pull onto the thread and damage the look of the stitches. Better just press it on top of the cover fabric, wait a moment, lift and move to another place, repeating this pattern until all the wrinkles are smoothed out.
Honestly speaking, I didn't know this rule at first and for a while, I used to simply move the iron around and never did anything bad happen to the needleworks. But I guess it is better to be on a safe side? I prefer to press and lift now. Besides, it is just more effective.
Few more rules
1. If you used hand-dyed thread or fabric for your embroidery it is better to not wash and iron it at all. There is a big chance that the dye is not permanent enough and can easily bleed ruining the embroidered work. Be careful.
2. If you used a water erasable marker for transferring the pattern, then before ironing wash the embroidered piece as a whole, not missing a single spot. I will tell you a story. I once used the marker when I wanted to sew something (a bag, I think?) and marked the fabric with it. When the marks were not needed anymore I just sprinkled some water on them and ironed the fabric. When the piece of fabric dried out completely, the inks reappeared in another place. I sprinkled it again, but they still returned. It kept repeating until I had the whole piece soaked.
I'm also not really sure, but I noticed the tendency of the blue inks to become more permanent after heat was applied. This could be relevant only for one marker for all I know, but again, to be on a safe side – if you don't want to deal with the troubles later, just wash the whole of the needlework before ironing.
3. You can safely apply steam and misting the fabric with distilled water as you are ironing. In fact, it is better to iron when the fabric is still slightly damp after washing.
When wrinkles are extra stubborn
Now, to the most troublesome cases when the wrinkles just won't go no matter how long you iron the embroidery through the covering fabric.
Usually, it happens with linen as a ground fabric, but in my case, it is cotton muslin which I love to the bits for its natural look but which also is annoyingly stubborn after washing. The wrinkles only go after a fight.
So, in this case, first thing – you can iron the ground fabric carefully around the embroidered area.
Then cover your embroidery with a thin fabric again. I used a piece of the same cotton muslin. Yes, even if wrinkles and creases are stubborn we still don't iron the needlework directly – only through some medium.
Remove the piece of covering fabric and iron carefully again, still avoiding touching the needlework with the hot tool.
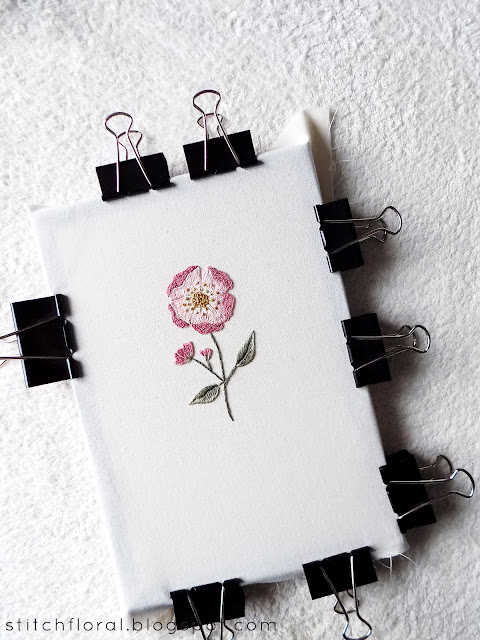
If you notice some puckering around the stitches, you can remove them by stretching the fabric.
I use cheap photo frames and office clips for this purpose. If you have a cork board you can pin your needlework and stretch it there. Maybe you will find another way to stretch it? Either way, just leave it overnight and the fabric will memorize this stretched state and the puckering will be gone.
You might consider me a washing and ironing advocate, to be honest, because I really believe that it gives your embroidery a new, fresh look. Aren't our needleworks our babies? We should take a good care of them.
Do you wash and iron your needleworks after you complete them? If you have any extra tips and secrets, share them below in the comments section!


I have embroidered pillow shams and ironed with a light spray starch in the areas without the threads, and "steamed" the stitched areas.
ReplyDeleteOh, thank you for sharing!
DeleteThis is helpful, nonetheless it can be crucial so that you can check out the following website: ironing board
ReplyDeleteSince you have gotten you quality sewing machine, we need to consider the needles that you need to purchase for your use. The manufactures use a numbering system for their needles. They use a letter to sort needles and surfaces are addressed by the letter. Here is a useful helper. brother leather sewing machine
ReplyDeleteThe first is machine embroidery and the second is hand embroidery. Both are common today, though most of the items that you purchase are machine embroidery.this website
ReplyDelete