Today we will take a look
at Lattice work variations!
I have prepared 8 examples
for you in total, but that is totally not the limit. I just hope it
will spike your creativity and give you some inspiration because the
possibilities of combining various elements are truly endless!
Also, I would like to
mention Crewel embroidery here again. If you crave to see more
examples of Lattice work to feed your inspiration, you will find LOTS
of great ideas in the world of Crewel embroidery. It's a true
treasure box!
And make sure you know Lattice work basics before proceeding.
Well, without further ado,
let's get straight to the business!
1. Couching variations
The purpose of this
example is to remind you about 3 main couching ways in Lattice work.
You can couch the thread intersections by one diagonal stitch (in
either direction) or two diagonal stitches forming a cross stitch. Any will
work. And maybe you can even combine them like in this example? It
surely will create a quirky pattern.
2. Chequered grid + French
knots
Adding french knots to
Latice work is a common practice. And it looks very pretty! One of
the ways is to simply add a french knot into the center of every
other cell, following imaginary checkerboard. You can use different
colors of thread for the thread grid, couching stitches and french
knots for a brighter and more eye-catching effect :)
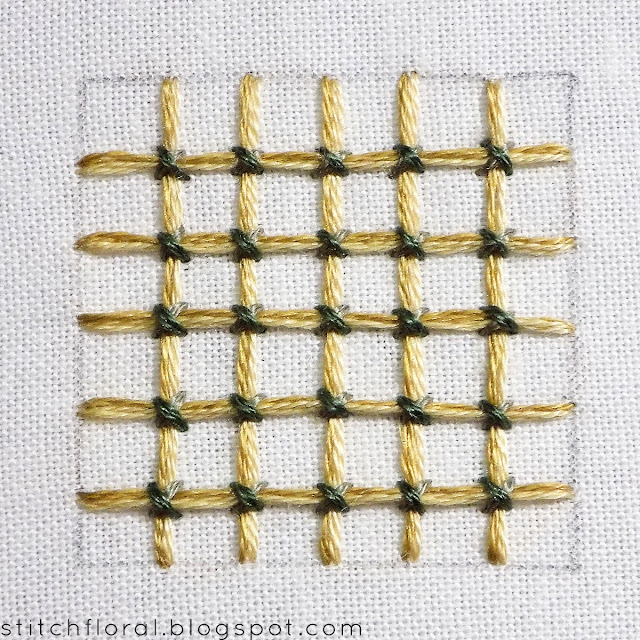
3. Multicolored grid
Speaking of colors, who
says that your thread grid has to be monochromatic? Add a pinch of
color there as well! In this example, I went the more modest path and
used two hues of yellow, close to each other. Then I used 2 colors of
green to work cross-stitched couching in the intersections. Feel free
to play with colors more, be bolder and add some contrast. I'm sure
you can create something captivating! (By the way, I hope you know
that using 1-2 threads to form a grid is not the limit either, wink
wink)
4. Chequered flowers
Yes, get used to the
checkerboard order in these grids! It actually helps to invent really
cool patterns, so don't mind the repetitiveness :)
Here I couched all the
intersections with one diagonal stitch in the same color as the
thread grid. And on top of that, in the corners of some of the
intersections I worked small french knots – in my case, I had to go
for 1 strand of thread and 1 wrap around the needle. It looks like
flowers blooming across the grid in a staggered manner and what makes
it more attractive is that they're not placed inside the cells, but
in the corners of cells. So it makes you want to take a second look
to understand how the pattern really functions.
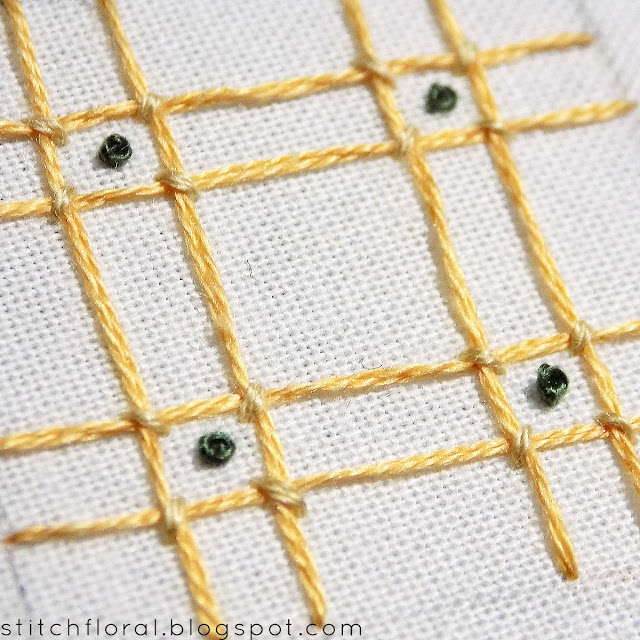
5. Adjust the distance
between grid cells
Most of the time you will
see thread grids to be perfectly even in Lattice work, with the same
distance between every vertical and horizontal line. However,
sometimes you might want to add some variety and make your grid stand
out more. Above you can see an example of how you can do that. There
are many ways to adorn the cells formed with this kind of grid, for
example, place french knots inside of them.
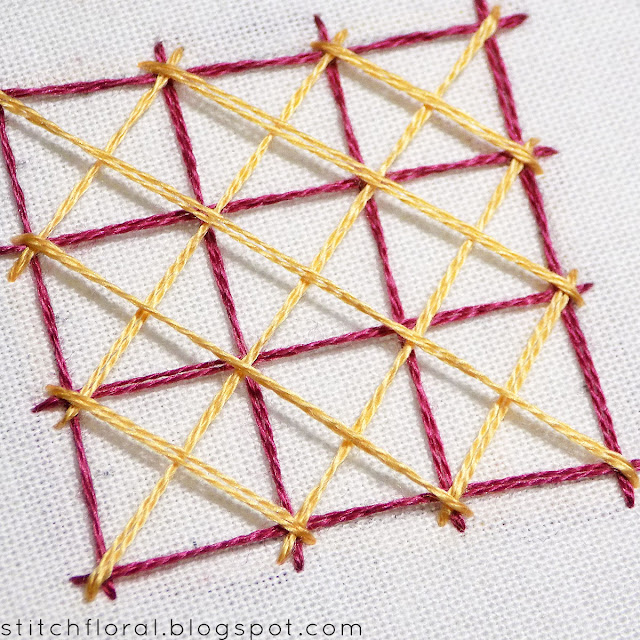
6. Add diagonal lines
Here is an example of
diagonal lines added in one direction only. They are usually laid
over the primary thread grid, and because they still intercross with
other threads in the same place, you can couch all 3 lines together
simultaneously. You can also play with colors, using different
threads for the primary grid, diagonal lines, and couching stitches. I
wouldn't place french knots here to not oversaturate the pattern, but
you never know what fun pattern you can invent with your experiments!
Just a random idea: you
can actually place tiny knots in triangles formed under the diagonal
lines inside the square cells. It would create distinctive lines
inside the Lattice pattern, but you have to be careful with colors to
not make it too difficult for the eye to focus.
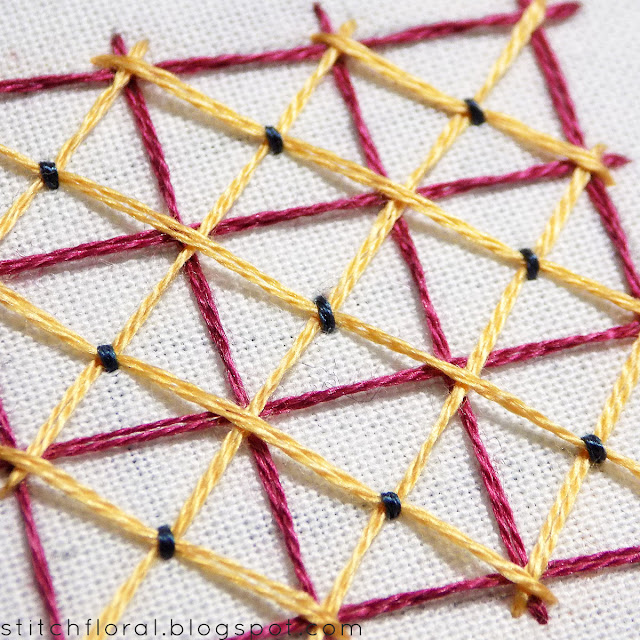
7. Diagonal lines + weaving
This example is a bit more
difficult compared to the previous ones so I will break it down on
steps for you.
First, we work two thread
grids: the primary one with vertical and horizontal lines, and the
second one with diagonal lines. The latter grid sits on top of the
former.
The primary grid's cells
now have diagonal lines' intersections inside of them, and we can
couch them. Use 1-2 stitches, as you will.
And in these places, we
have now 4 lines crossing each other: two from the primary grid and
two from the secondary one. If we count the directions, it will be
whole 8! Which makes it easy to weave these intersections. We can't
really create something like the spider web stitch here, since the
number of directions is even. But even so, we can work a neat wheel
here, which is just as cool.
Bring your thread up near the center of the intersection and start weaving with your needle not leaving the surface of ground fabric.
This is the result.
Granted it's a little
complicated with all the layers, but it actually doesn't take much
time and all of the efforts are worth it!
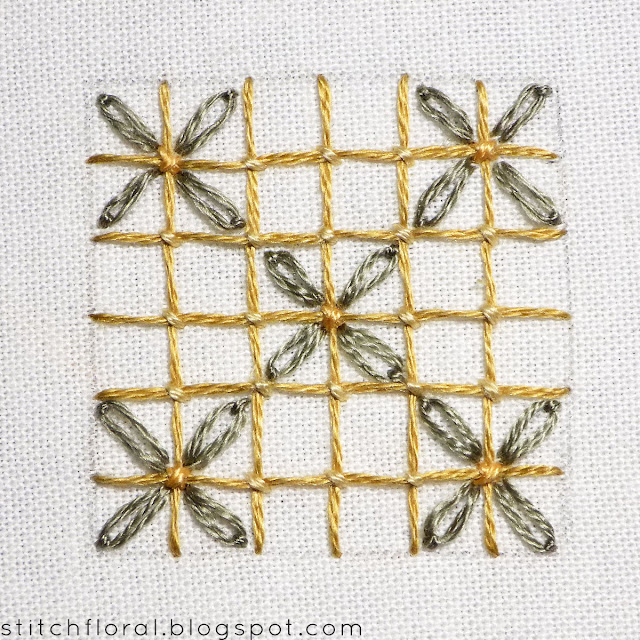
8. Add lazy daisies
One of my favorite
variations! Isn't it lovely? :)
It is worked on a standard
even thread grid. Place lazy daisy in the same manner as we did in
example 4, stemming from one intersection. Except that, because the stitches are long, they will start
in one corner and finish in another one, taking up a whole of four
cells. Remember that lazy daisies are only an embellishment – you
still need to couch all of the of intersections.
And that's all!
I hope you draw some
squares on a piece of fabric that fits the purpose of practice, and
train lattice grids. Especially if you're out of inspiration or just
want to flex your embroidery muscles without any real “mission”
in head. Just have fun and experiment with shapes and colors – it
will bring pretty much the same effect as coloring a mandala with
crayons, hehe :)










Really nice variations of latticework! My favorites are 7 and 8.
ReplyDeleteI'm happy you like! :)
DeleteLovely post!
ReplyDeleteThank you, Gouri!
DeleteThe example 8 is awesome !!! Thank you for sharing ❤
ReplyDeleteI love it too! My pleasure :)
DeleteSo many great ideas - they all look so pretty, I will have to try them :)
ReplyDelete