I've been so focused on
telling more about the stitches lately, that I only now realized that
I didn't share anything from my own embroidery for quite a while.
GASP! Well, to tell the truth, there's not that much to show... But there's something that might be of interest in my current process
regarding starting the thread issue ;)
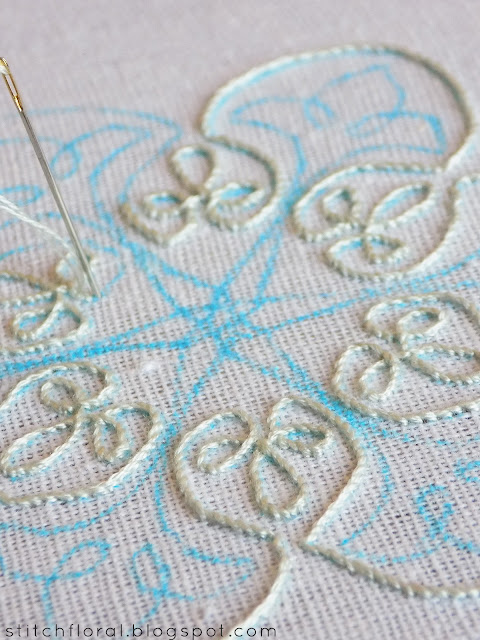
So, in the picture above
you can see the start of my new small stitching. That's a symmetrical
design I borrowed from the Godey's magazine. It's not present
on the list of the vintage embroidery books that I posted a
while ago, because it is so huge (more than 1000 pages!!) that I
didn't have the powers to check its contents entirely. But I would
definitely recommend to page it through at least a little, there are
some designs worth attention :)
This type of linear
designs are perfect for practicing stem stitch, so that's what I
decided to go for. Just look at these tight curves! Working such
swishes in stem stitch can be a little tough and challenging but the
main secret here is to make the stitches tinier. Sometimes my
stitches here grabbed only one thread of fabric. Surely, it is more
time consuming, but its worth the effort!
In addition, it is a good
chance to grasp the concept of changing the direction of stem stitch, because you do that a LOT in this design!
But that's not really the
subject of today's post. What I wanted to share today are practical
examples of securing your thread when you start embroidering a linear
design.
And before we dive into the subject you might want to check
the 3 ways to start your thread post, to have a better idea of
what I'm speaking about.
Normally, I stick to
anchoring stitches when I want to start my thread – either
when I fill in the shapes or when I work the lines. However, on some
occasions (some fabrics and some particular stitches) I find that the
anchoring stitches are quite noticeable. This design is that
type of occasion when anchoring stitches
are not the best option. So, instead, I used the couching method.
For this, when you bring
the needle up the first time, you need to leave a considerable “tail”
on the backside (I leave about 2 cm), which you then couch with your
stitching. Stem stitch fits perfectly for this way of starting the
thread, because it leaves small “back stitches” on the
backside, which you can use for couching the thread. After you couch
it, you can snip the remaining part of the “tail”. But I usually
leave it and snip after I finish the embroidery :)
The funny thing with
stitching this design was that the processes of starting and ending
thread always happened at the same place – at these tough curves!
Well, that's symmetry for you, ha.
There's one more way of
securing the thread that I'm using in this design. These curves are
not going to be empty – I'm going to make a veeeery simple grid using
one strand of thread in the needle. This means couching is not
possible, anchoring stitches are again not an option. A tiny knot?
Not an option either, because it
can pass through the hole in the fabric. It's not that closely
woven, as you see. So, what I do in such cases is anchoring my thread
on the nearest stitches.
I just run the thread
under few of the previous stitches (sometimes can run twice under one
stitch). I pull the thread gently and as soon as I feel that it is
secured decently, I can snip the knot (if it's there, because you can
do that without a knot as well).
So, that's it for today. Sometimes
you have to be inventive when you stitch and want to avoid the knots... If you have any more questions about securing the thread when you
start it, you can write in the comments below, or send me a message through the contact form on the right :)
Hope you all have a nice
weekend and enjoy some stitching!


No comments
Write what you think! ❤
Note: Only a member of this blog may post a comment.