It's Wednesday and it
means that we will speak about a new stitch today! Last week we took
a look at satin stitch basics which can be worked with or
without an outlining. A very handy stitch, great for filling in all
sorts of shapes and sometimes can be used exclusively to work whole
designs. Today we will speak about its “upgraded” version –
padded satin stitch.
The instructions are quite
easy, especially if you are friends with a normal satin stitch, you
probably won't meet any difficulties.
So, first of all, we make
an outline for the shape using one of the line stitches. I usually
use split stitch, but back stitch and stem stitch will fit in here
too.
Next, we fill in the shape
with stitches – this is what we call the padding. This area
will be covered later, so your stitches don't have to be perfect –
no one will see. What's important here is functionality, not the
appearance. I tend to use parallel stitches, and I don't really fret
if they are not placed evenly. I know that some stitchers prefer seed
stitches for the padding. You can use anything you want, really, the
main thing is that the area is padded, so that the satin stitch
doesn't hand in the air but lies on top of the stitches.
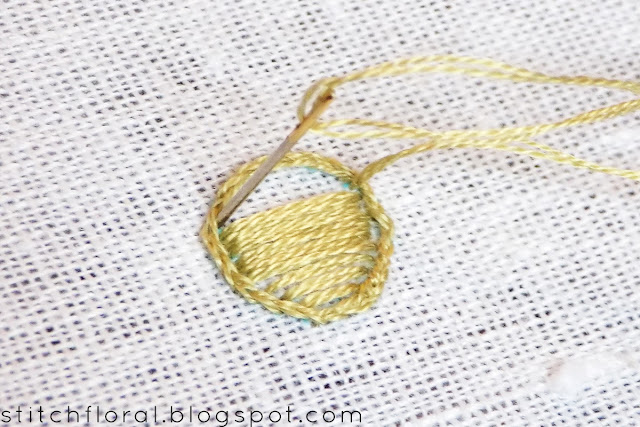
Now, after the shape has
been padded inside, we can start with the satin stitch. And just like
we did in the basics post, we start from somewhere around the
middle, slanting our stitches.
We fill in one side of the
shape and then return back to the middle, where the first stitch was
made, and fill in the rest of the shape.
And our padded satin
stitch is ready.
If you are satisfied you can leave it like that.
But, actually, there's no limit to the number of layers you can make
this way! ;)
So, suppose, you think
your shape needs a bit more dimension. Then you just start a new
layer of satin stitch. Make a slanted stitch somewhere around the
middle of the shape (change its angle)...
... and go on covering the area
with parallel stitches.
The more layers you do,
the more raised your shape will be. Well, to be honest, I used padded
satin stitch with two layers at most (like for the dark blue center
of the flowers in the Winter Joy wreath) and didn't experiment
with having more than that. But I think it would be interesting to
try!


Thank you😀
ReplyDelete