Another way of filling a
shape in your embroidery pattern :)
Lots of pictures below,
you were warned!
So, the stitch of this
month is detached buttonhole! Or, rather, the technique
of this month, because actually, this stitch has some variations and
the name can even be extended to a technique common for stumpwork
(which will hopefully be covered in one of the next posts).
But I digress.
If you are not familiar
with a regular buttonhole stitch, check out these posts first:
I
recommend trying it out on a spare piece of fabric first, at least
the basic one, to get used to the way it is worked. Although, you can
actually work detached buttonhole without any preparation!
Now,
let's start the lesson because it is quite long as it is.
Detached buttonhole type 1: loose
I'm
working this one with 1 strand of floss.
First,
we need to outline the shape. I used chain stitch,
but other line stitches will do just as fine: back stitch,
stem stitch, split stitch will suit this purpose.
Now, if you strive for perfection, you might want to work the
stitches evenly on the left and right sides. In this case, they will
serve as a sort of mark.
I'm
usually the one to take it easy, so my stitches aren't perfectly
aligned, they only serve the purpose of being an outline. Because of
that I don't have marks and have to rely on my intuition, but I
don't really mind, haha.
We
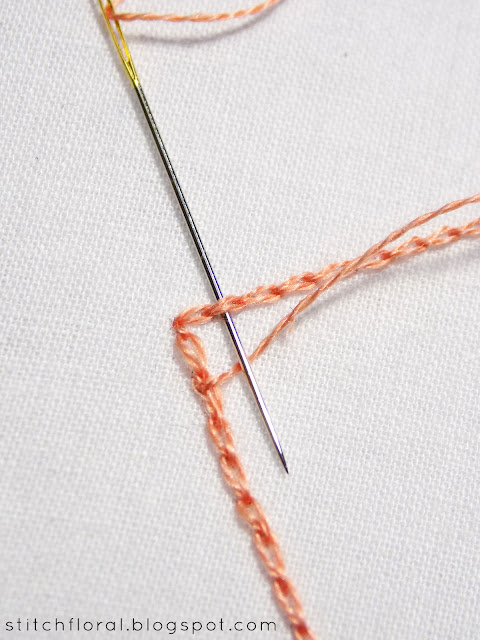
begin the first row of detached buttonhole the following way: bring
the needle up through the fabric at one side of the shape, a little
under the top, then slide the needle through one of the stitches of
the outline vertically with your tip going downward. Notice how the
working end of the thread is being tucked under the needle tip at this
step.
Pull
the needle through, forming a loop. Keep it loose enough, don't pull
too tight. But also, keep it in shape, you know? Well, you will get a
hang of it once you try!
Keep
making stitches the same way and don't forget to slide your needle
under the top stitches with its tip down and with the working thread
tucked underneath.
After
you make the last loop, insert the needle on the other side of the
shape, a little below the top level, mirroring what you did in the
first step.
Now
come up through the fabric on the same side and repeat all the steps
except that now you will be anchoring your loops on the ones from the
row above.
Keep
going!
By
the way, for weaving techniques like this it is always better to use
a needle with a blunt tip to avoid picking on thread fibers. I was
too lazy to search for one in my stash though, so I just moved the
needle with the needle eye down.
If
you look closely at the loops from different rows you will see the
slight difference in how they are formed. It is because we change the
direction with every row. But the difference is very difficult to
notice without looking closely so we can make this sacrifice in order
to save thread, right?
It
will not work for the other type of detached buttonhole though....
When
we finished, we need to anchor the last row. For that, make a loop
like you would normally do, tucking the working end of thread under
the needle, and then slide the needle under one of the stitches from
the outline.
It
will anchor the loop to that stitch.
Keep
doing the same with the rest of the loops in the last row.
Anchored well!
The result. Well, not
perfectly neat, but it is a practice so I didn't really sweat over
it, haha.
I actually used this
detached buttonhole for the leaves in this pattern! You can
see that it can be worked for irregular shapes as well. Going to be a
little challenging, but you just need to calculate the way place your
rows.
Detached buttonhole type 2: close woven
The order of work for this
is almost the same, the core movements are identical – we just add
one more element.
For this shape, I'm using 3
strands of floss, to make the weave even more close and dense. If I
worked it with 1 strand of floss it would be a little more airy, but
I wanted to show how to get that “heavy” effect.
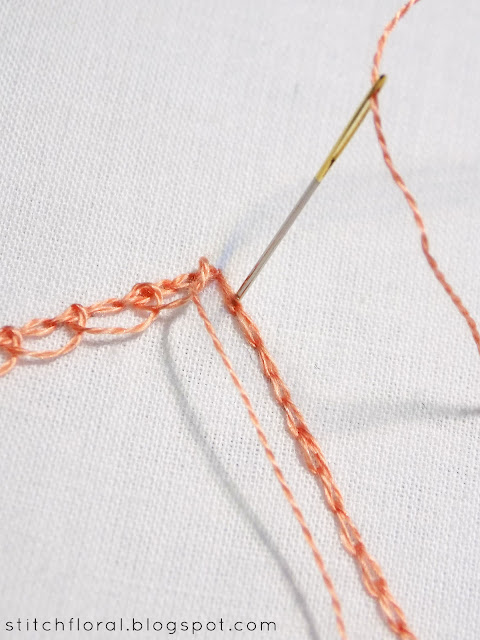
So, work an outline for
your shape, I used back stitch here. Then, come upwards through the
fabric at one side of the shape and insert the needle at another side
on the same level. You are making a giant straight stitch this way,
which lies horizontally on the fabric.
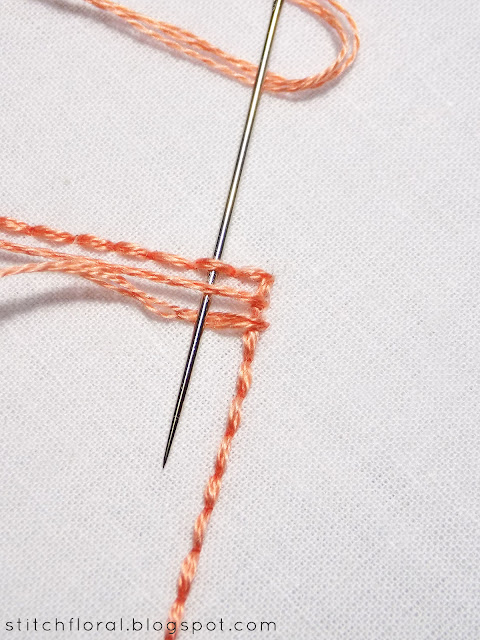
And then, on the same side
where you inserted the needle last time, you will come up a little
below that bar, and make a loop. The loop is worked almost the same
way as before: the needle sliding downward through the stitch above,
except that the needle also goes under the bar before you tuck the
working thread under it. So, remember: under the stitch above, under
the bar, but over the
working thread.
This way, you are trapping
the bar stitch inside your loop. And then you can continue working
the full row repeating the previous steps.
When you reach the other
side, you need to make a new bar and start another row of detached
buttonhole.
So, basically, you always
start on the same side. With this type of weaving and this thickness
of thread, if you start a new row of loops from another side, the
difference will be more visible. It is not that likely to start from
the other side, though, because you always come back to the same one
after making another bar, anyway. But I'm telling this in case your
thread ends and you want to continue from the other side. The
difference in loops will be clear!
Now to the topic of
anchoring the loops. I have two suggestions.
Here, as you are working
the last row of loops, you can slide under the outline stitch as
well. So, the order will be: under the loop above, under the bar,
under the stitch from the outline, over the working thread.
It will create a sort of
an edge.
Another way is to work the
last row of stitches completely (I cut it in half here just to show
you what it would look like), and then anchor every loop like you
would do with a fly stitch.
This is how it can look
like. You can also anchor it right over the outline stitches!
I used the first method to
save thread because it was about to finish, haha.
It can be worked even
closer, actually. To the point that the background hardly peaks
through at all. For that, make your loops shorter – I skipped every
other back stitch when I was working the first row, but you can make
a loop for each one.
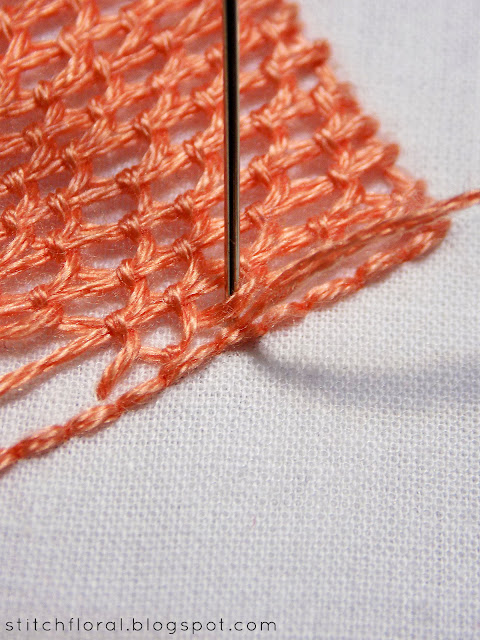
So, here are the new ways
you can fill your shapes in embroidery. One is an open filling, like
lattice, the other is... semi-solid, I would say? It will depend on
how closely you work it and how thick your thread will be!
Oof, congrats if you made
it till here! See you at the next tutorial! :)


très bien vos explications merci beaucoup
ReplyDelete