Another one from the list of essential hand embroidery stitches. As you may guess by the name, this stitch resembles a chain. However, there's more to its looks and variety. Today I'm going to cover the chain stitch, reverse chain stitch and broad chain stitch.
Last time I talked about a lazy daisy stitch, which is one of the basic stitches in hand embroidery. As I mentioned in my previous post, another name for it is a “detached chain stitch”, and from this post, you will see why.
So, first of all, let's see how to chain stitch:
Bring the needle up through the fabric and bring it back down right next to it.
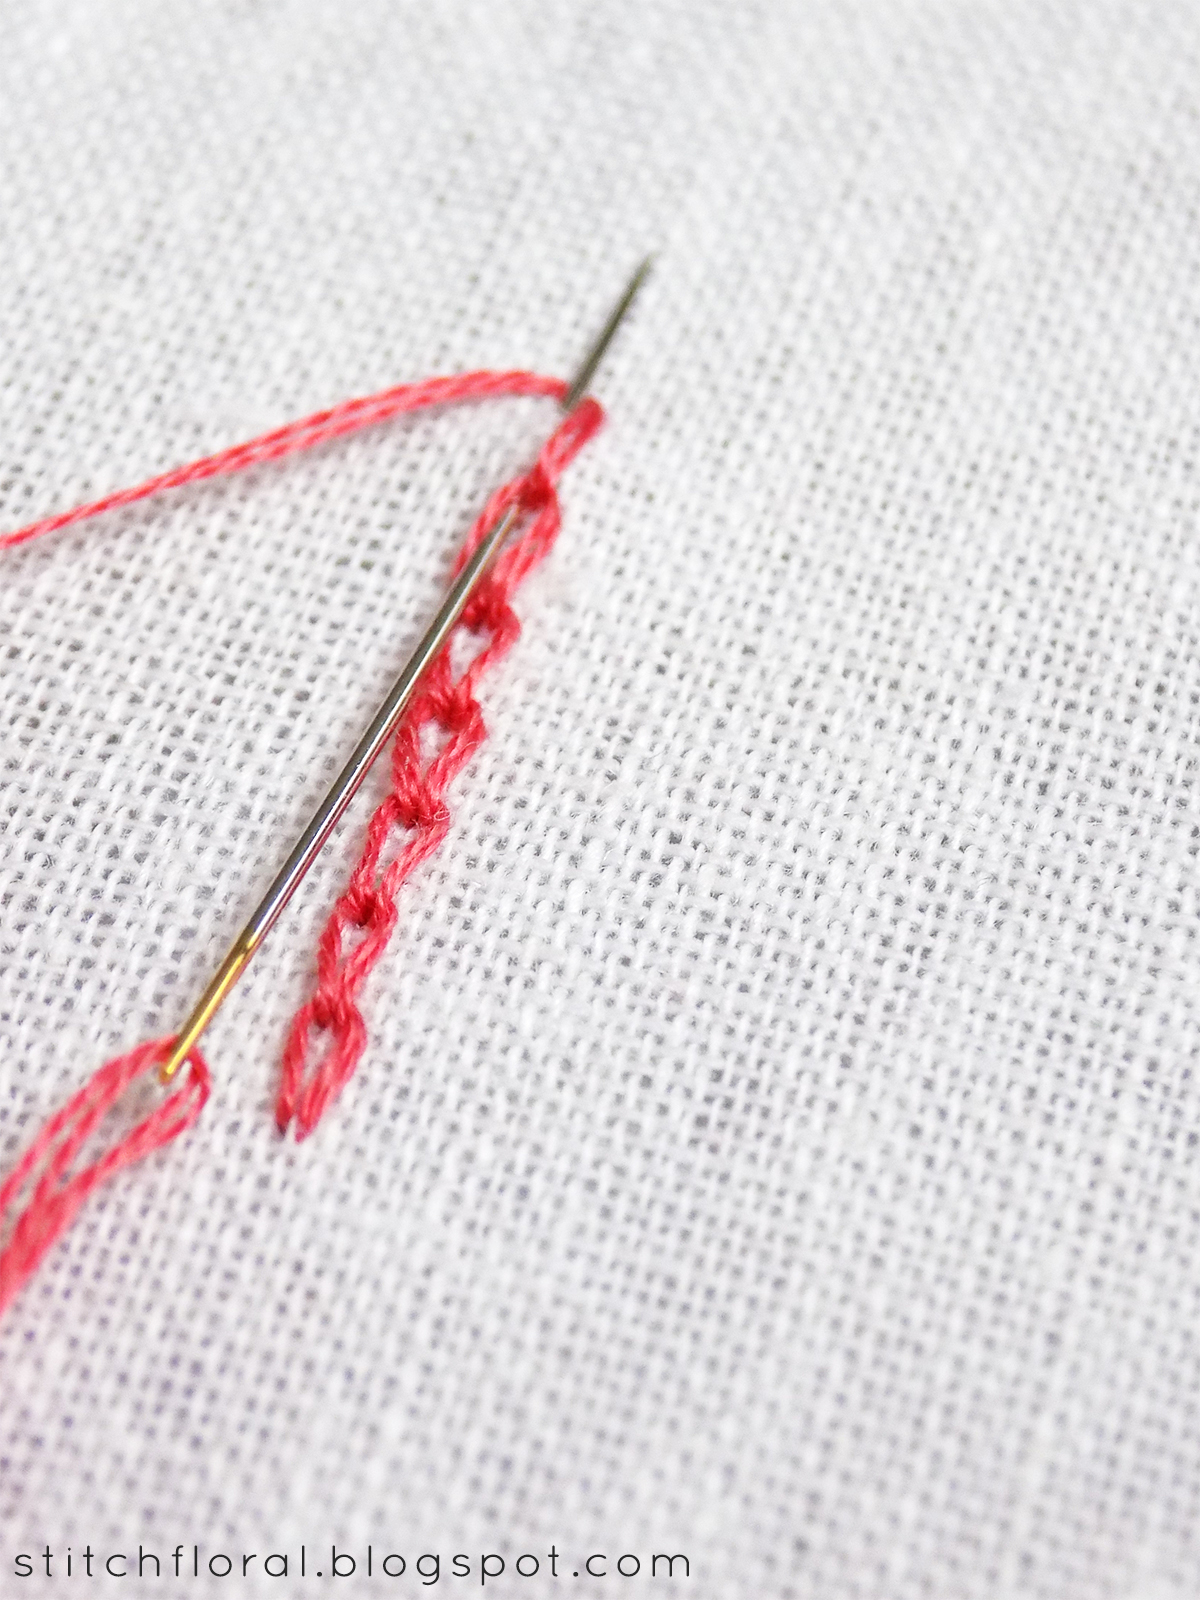
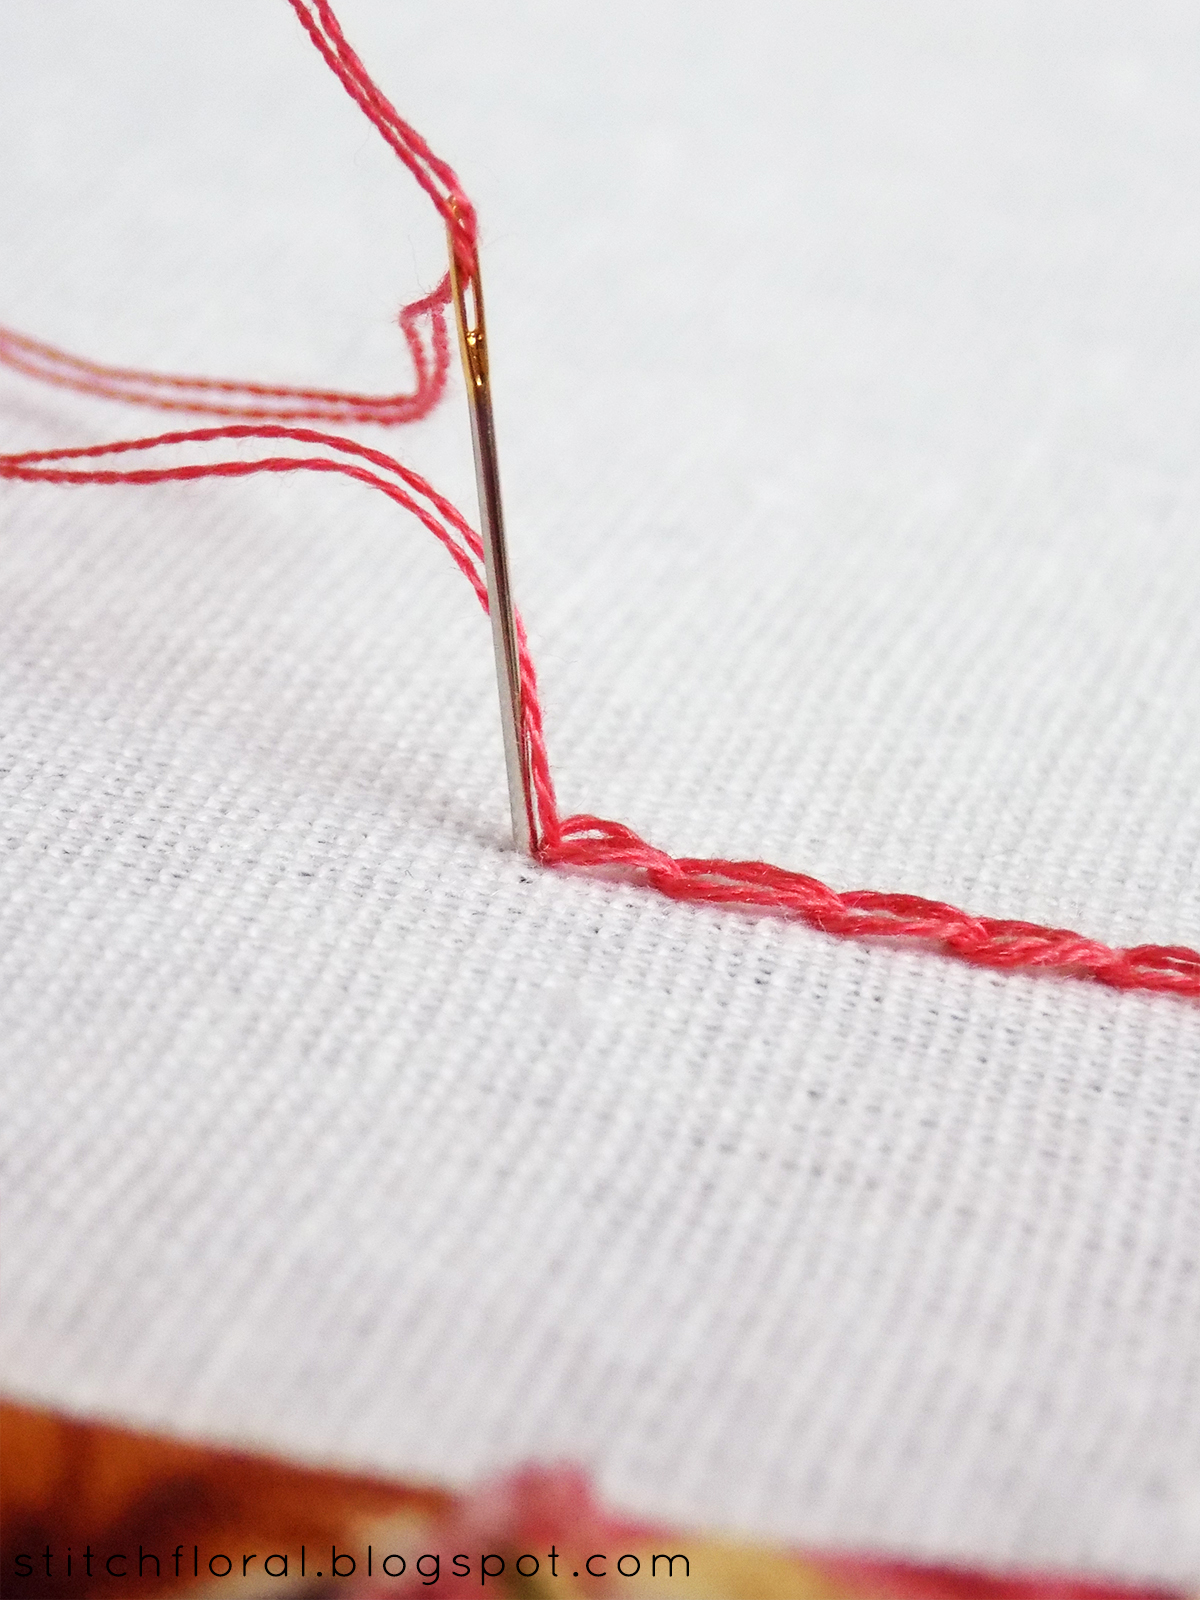
As you are making a loop, pierce the fabric in a short distance from the starting point, bringing the needle up inside the loop.
Bring the needle back down next to the previous point, making a loop again. Repeat the previous steps. Make sure that points 1 and 3, and points 2 and 4 are on the same lines, being parallel to each other.
Or you can stitch the chain like this – pulling the thread under the tip of your needle as you go.
When you finish the line, fix your last chain link with a running stitch.
Does it ring a bell? That's right, the same way we stitched lazy daisy! That's why it is also called a detached chain stitch.
It can actually be stitched in reverse direction, like back stitch.
This way you start from the “end” - first make a running stitch, then make a loop pulling the thread under the first running stitch.
As you stitch new chain links, the thread will be pulled under the previous ones. You can find different names for it: reverse chain stitch or backstitched chain stitch. But the most important is that the look of the chain doesn't differ whatever direction you choose to stitch it.
So, this is how you can chain stitch! It is often used for stitching lines, curves, lettering and sometimes as a filler stitch to cover certain areas. It can also be used in combination with other stitches and embellished with beads, so the final look depends only on your fantasy!
The final look will also depend on the number of floss strands in your needle and the distance between the “base” points of the stitch.
For example, in the picture above the third and fourth rows are stitched with the loops having only one base point, but the different number of thread strands and different length of the stitch.
In the last row, you can notice that the distance between the “base points” of the loop is much wider, which makes the chain broader. And that's exactly how it is called among stitchers: broad chain stitch or open chain stitch. Note, that when you finish the line of broad chain stitch, you will need two running stitches to anchor the last loop and keep its form similar to all the previous ones.


Thank you so much for your clear, detailed explainations. The posts are of a very high standard.
ReplyDeleteThank you, Roseanna! :)
DeleteHi Amina I desperately need some help here! Can you please explain to me how to achieve a sharp point when using reverse chain stitch? I cannot make even good looking stitches when using a regular chain stitch but they look great when I do a reverse chain stitch. I cannot for the life of me find a detailed explanation anywhere on utilizing the reverse chain stitch. I would love to see how to stitch a square and joining the stitch in a circle without being able to see the ending point. Any advice you could offer would be so appreciated. Sincerely, Sara
ReplyDeleteSara, I heard you! Expect the answer in the next blog post, will try to publish during this weekend :)
DeleteAmina you're amazing! Thank you a million times over! I know that your new post will have a ton of hits because I searched everywhere on the web and couldn't find anything to assist me. You have helped me tremendously thank you so very much!!!
ReplyDeleteгазовые теплогенераторы для воздушного отопления
ReplyDelete