Here are a couple of
tricks :)
I actually already shared
similar tips in the post 6 tips for better chain stitch but I
didn't realize that I did that for regular chain stitch and the
reversed one has its own peculiarities. However, you might be surprised
that solutions are basically the same, except that the order of work
is a bit different!
So let's dig in.
If you don't remember how
to work reversed chain stitch you can refresh your memory in this post.
So,
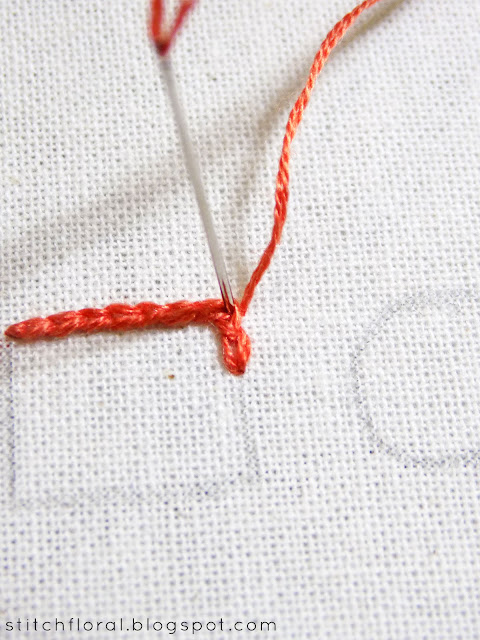
here we worked a line of reversed stitch and came up to the corner.
What do we do now if we want the corner to look seamless and sharp?
The
most obvious way would be to continue stitching the same way which
means sliding your needle under the previous stitch.
However,
it might leave you with a corner that is not as sharp. Even though
the chain is continued seamlessly.
So,
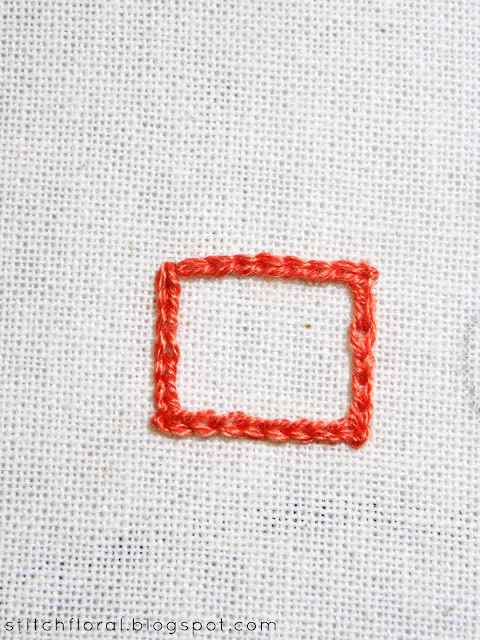
what I prefer doing in such cases, is to anchor the outer “wing”
of the chain loop with a tiny stitch.
It
makes the corner more apparent.
But
then we have another problem. We completed the last side and now the
point where we started the square and finished it stands out too
much.
So
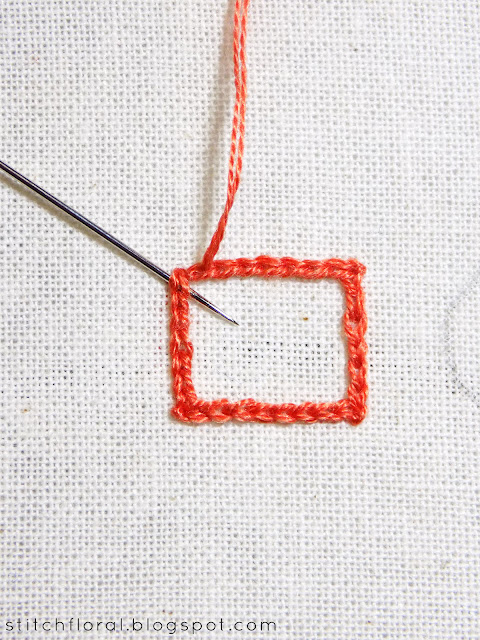
what we can do now is to start a stitch from the very first one and
slide the needle under the last one.
And
then secure the outer wing of the chain loop with a tiny stitch
again.
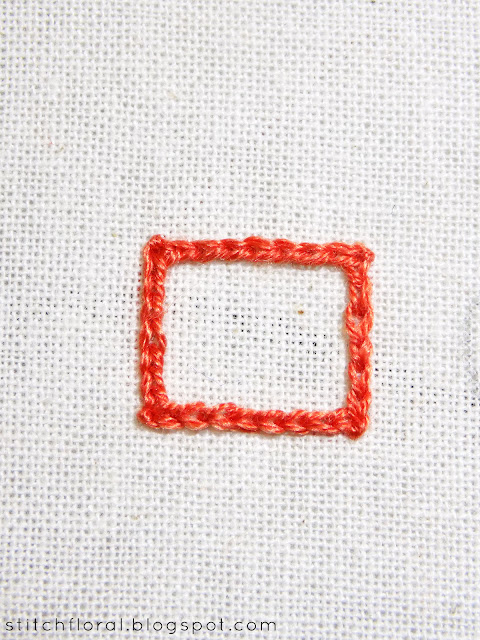
The
corners are clear and direction of chain stitching is continuing
naturally. The tiny stitches kind of stand out in my case, and when I
look at it now, I think I should have aligned them better. That's
just a draft though, but you can be more careful in your work than me
:)
Now,
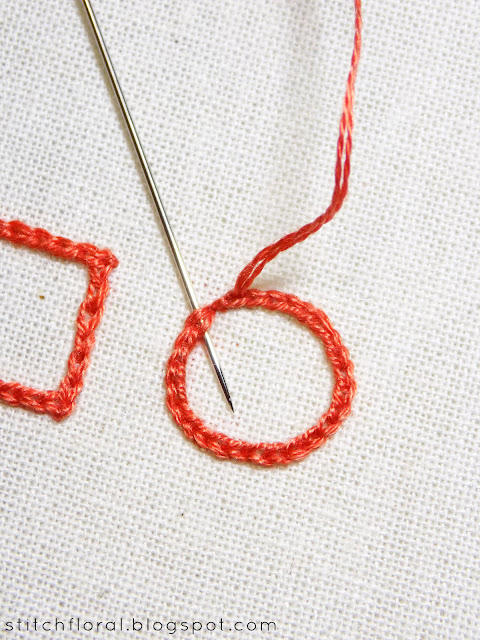
as for circles, the way to work a seamless joint here is
basically the same.
Start
your stitch in the very first one and slide the needle under the last
one.
There
is no need for extra anchoring stitches here because we don't need
any sharp corners here.
So,
here are some new tricks for you to use! Have fun with chain stitch!
:)







Thank you Amina, this is exactly what I needed! You're awesome!
ReplyDeleteI'm happy you found it helpful! :)
DeleteI can’t believe focusing long enough to research; much less write this kind of article. You’ve outdone yourself with this material without a doubt. It is one of the greatest contents. automotive logistics
ReplyDelete