Today I bring you a new
stitch tutorial. Along with the lesson itself, I thought it would be
nice to see where it can be used, so you will also see the process of
stitching this little blueberry twig :)
To be honest, this stitch
fascinated me from the first time I saw it in some pictures a long time
ago. But when I tried to learn it, it didn't work so after a while I
gave up, haha. Well, not really gave up... It's just that if something is
not going right I tend to put it away until a better moment.
Looks like a “better
moment' came yesterday, because that's when I stumbled upon this video and finally was enlightened on what I did wrong all this
time :D
Turned out that I did the
loops wrong! I thought that the principle of working this stitch is
the same as raised buttonhole
but it is actually different. So, a little tip before you dive into
the tutorial – pay attention to how the loops are formed!
And,
although I usually give you plain lessons and tutorials of stitches
that you can use later however you like... this time I was so excited
that I learned this stitch that I decided to practice it one more
time by working a tiny miniature with it.
So
now you have not just a raised cup stitch tutorial but also a blueberry twig
tutorial! :)
I
took a lot of pictures to make this lesson as detailed and clear as
possible so the post is going to be long, you were warned!
Raised cup stitch tutorial
So,
first of all, I doodled a tiny twig on my spare “draft” fabric.
Then
I worked the twig and the leaves. Since it is not the focus of
today's tutorial, I decided to not show it step by step. But I used
satin stitch for the
leaves and a loose split back stitch
for the twig. I didn't want to use any textured stitches for leaves
like fly stitch or
cretan stitch because
the berries were going to be textured already... so I kind of didn't
want the leaves to steal attention :D
Now
the fun part starts!
How
to do raised cup stitch:
Step 1:
Outline the shape with back stitch. Make your stitches consistent in
size and not too big. My shape was rather small so I used 2 strands
of thread. If you want to work a bigger shape, consider increasing
the number of strands to make it faster and easier for yourself.
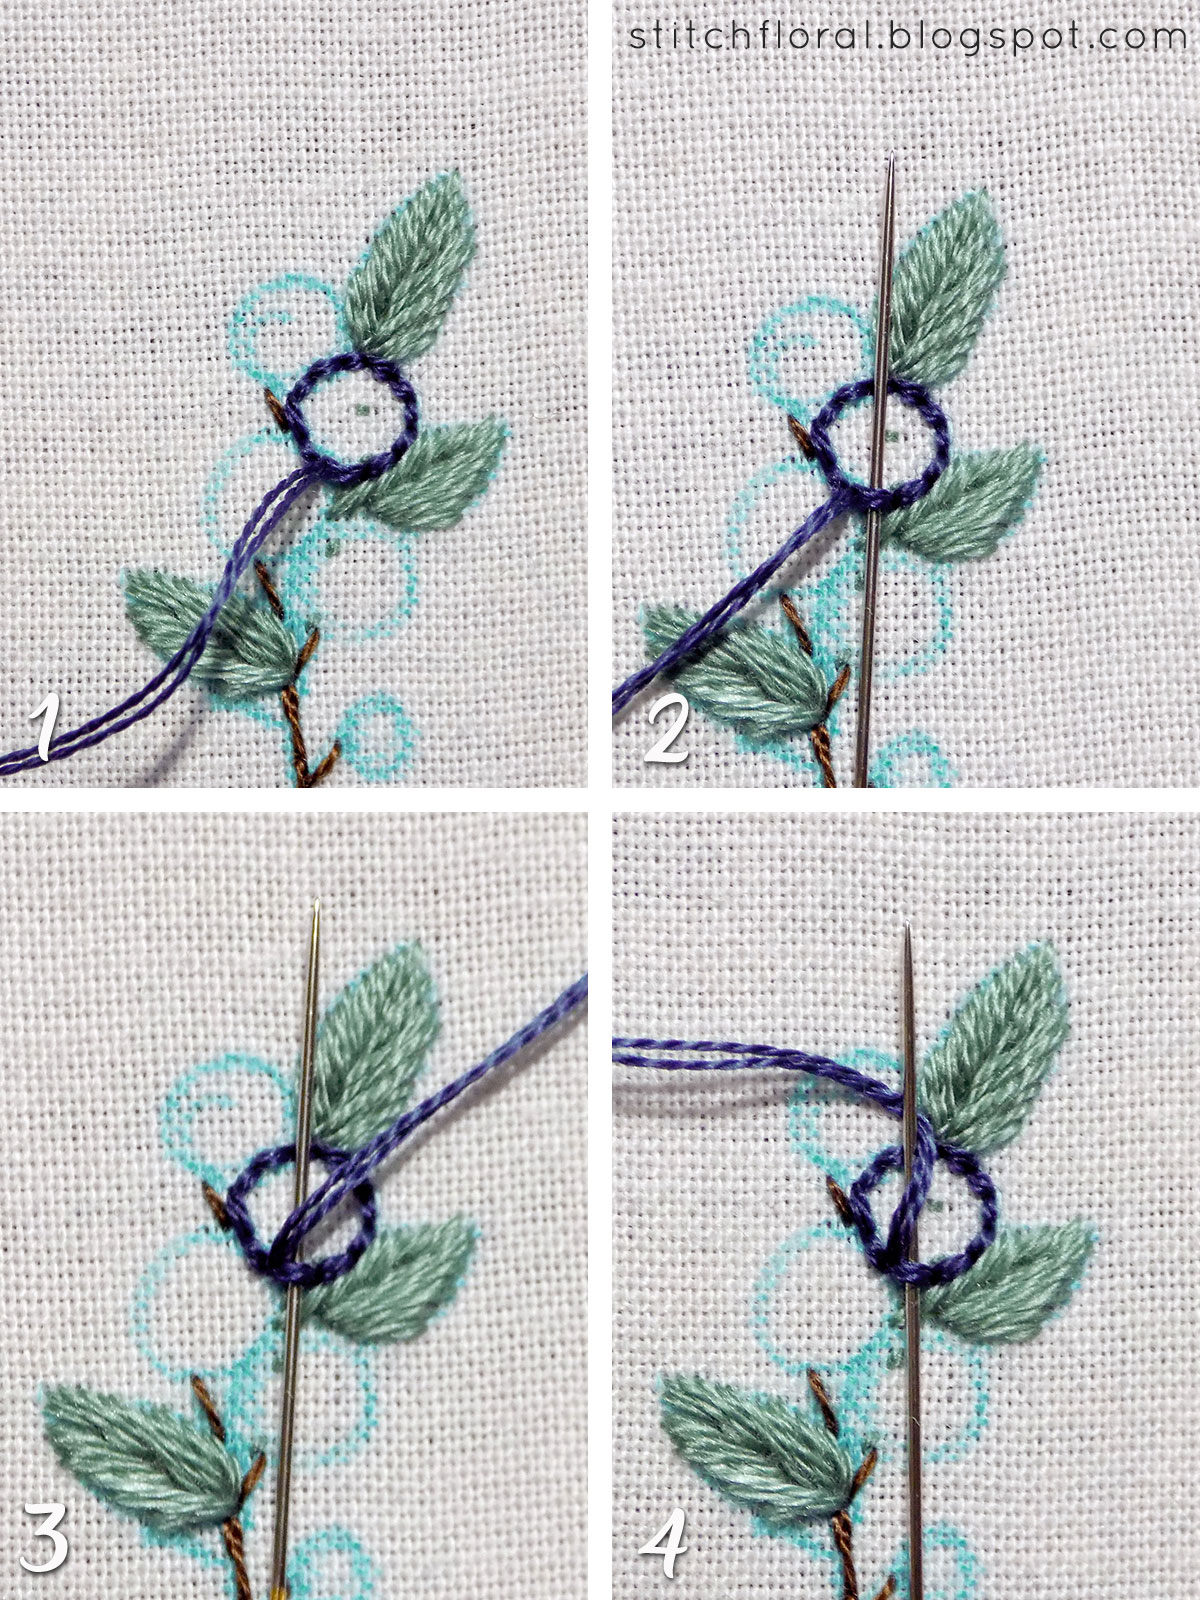
Step
2: Bring your needle back up between two back stitches. Slide the
needle under one of these stitches, bring the working thread over the
needle and then tuck it under the shaft. That's how you make the loop
correct way.
When
you practice more, you will probably find out the faster way of doing
it. I make these loops with two fingers now, like when you do cast-on
stitch :)
And then you pull the
needle through.
Step 3: Repeat this action
over each of the back stitches in the outline. And let's call this
row of loops the “first floor” of this raised cup.
Step 4: Our “first floor” is
finished. Now we start doing the same but over the loops below.
And, depending on the
shape and its size, you will need to work a few of these floors the
same way until it will be time to start decreasing the number of
loops so that the cup can close.
And to do that, simply
skip through one loop-base when making a new one, like in the picture
above.
Since my shapes were
small, I actually started skipping every other loop already on the
“second floor”.
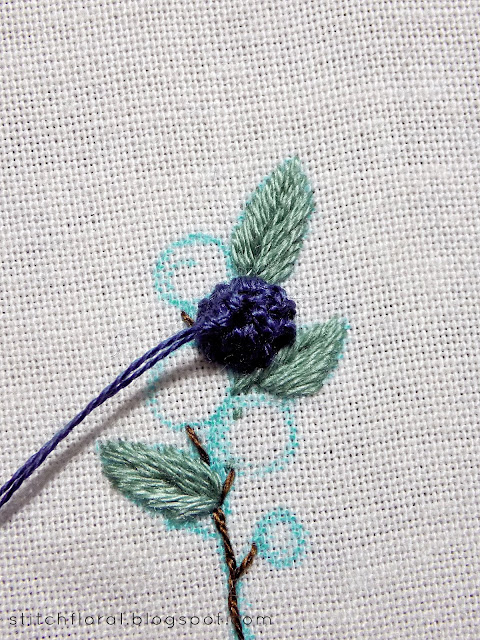
Step 5: Now, there will come a
time when your cup will look like this. If you continue working new
floors of loops you are likely to get a cone shape and that's not
really what we want, do we? So, instead, let's finish it here.
I do it like that: slide
the needle under a loop on the opposite side and...
...simply insert the
needle inside the cup. Just don't pull your needle too strongly to
not distort the shape.
And here you have it!
This is what a plain raised
cup looks like.
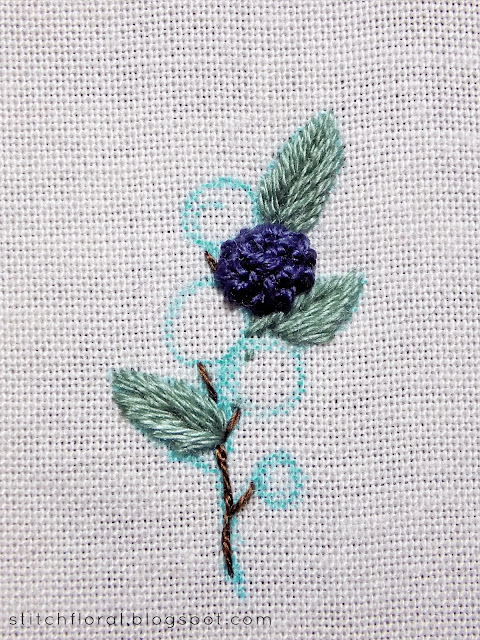
We are making blueberries
today so you can add extra dots with french stitches right on
top of the cups.
This is what the finished
twig will look like!
I think it's really cute.
And I really like the texture... I think I've already mentioned that
I'm weak for these types of stitches even though I don't really use
them often in my designs. I still like them and inshaAllah will find
a way to implement in some way in future works :)
In the meantime, here is the Pinterest-friendly stitch tutorial that you can pin and save for later:
By the way, this tutorial
can be easily adjusted for other berries and fruit too, even just by
changing colors. I'm sure you will get some cool ideas! Have fun and
stitch away!


Thank you so much Amina. This is a so beautiful tutorial!
ReplyDeleteThank you! I'm happy you enjoyed :)
DeleteI have never seen that stitch before. It's so cool and looks easy. Thanks for continuing to share your skill and knowledge here on your blog.
ReplyDeletexx, Carol
It is indeed quite easy and quick! Thank you for reading :)
DeleteAslammualaikum Thaks Amina
ReplyDeleteWa alaikum salam! my pleasure :)
DeleteI am new to embroidery and LOVE raised stiches. Thank you for sharing this great and easy method and the instructions are very easy to follow. "Kilroy was here"
ReplyDelete