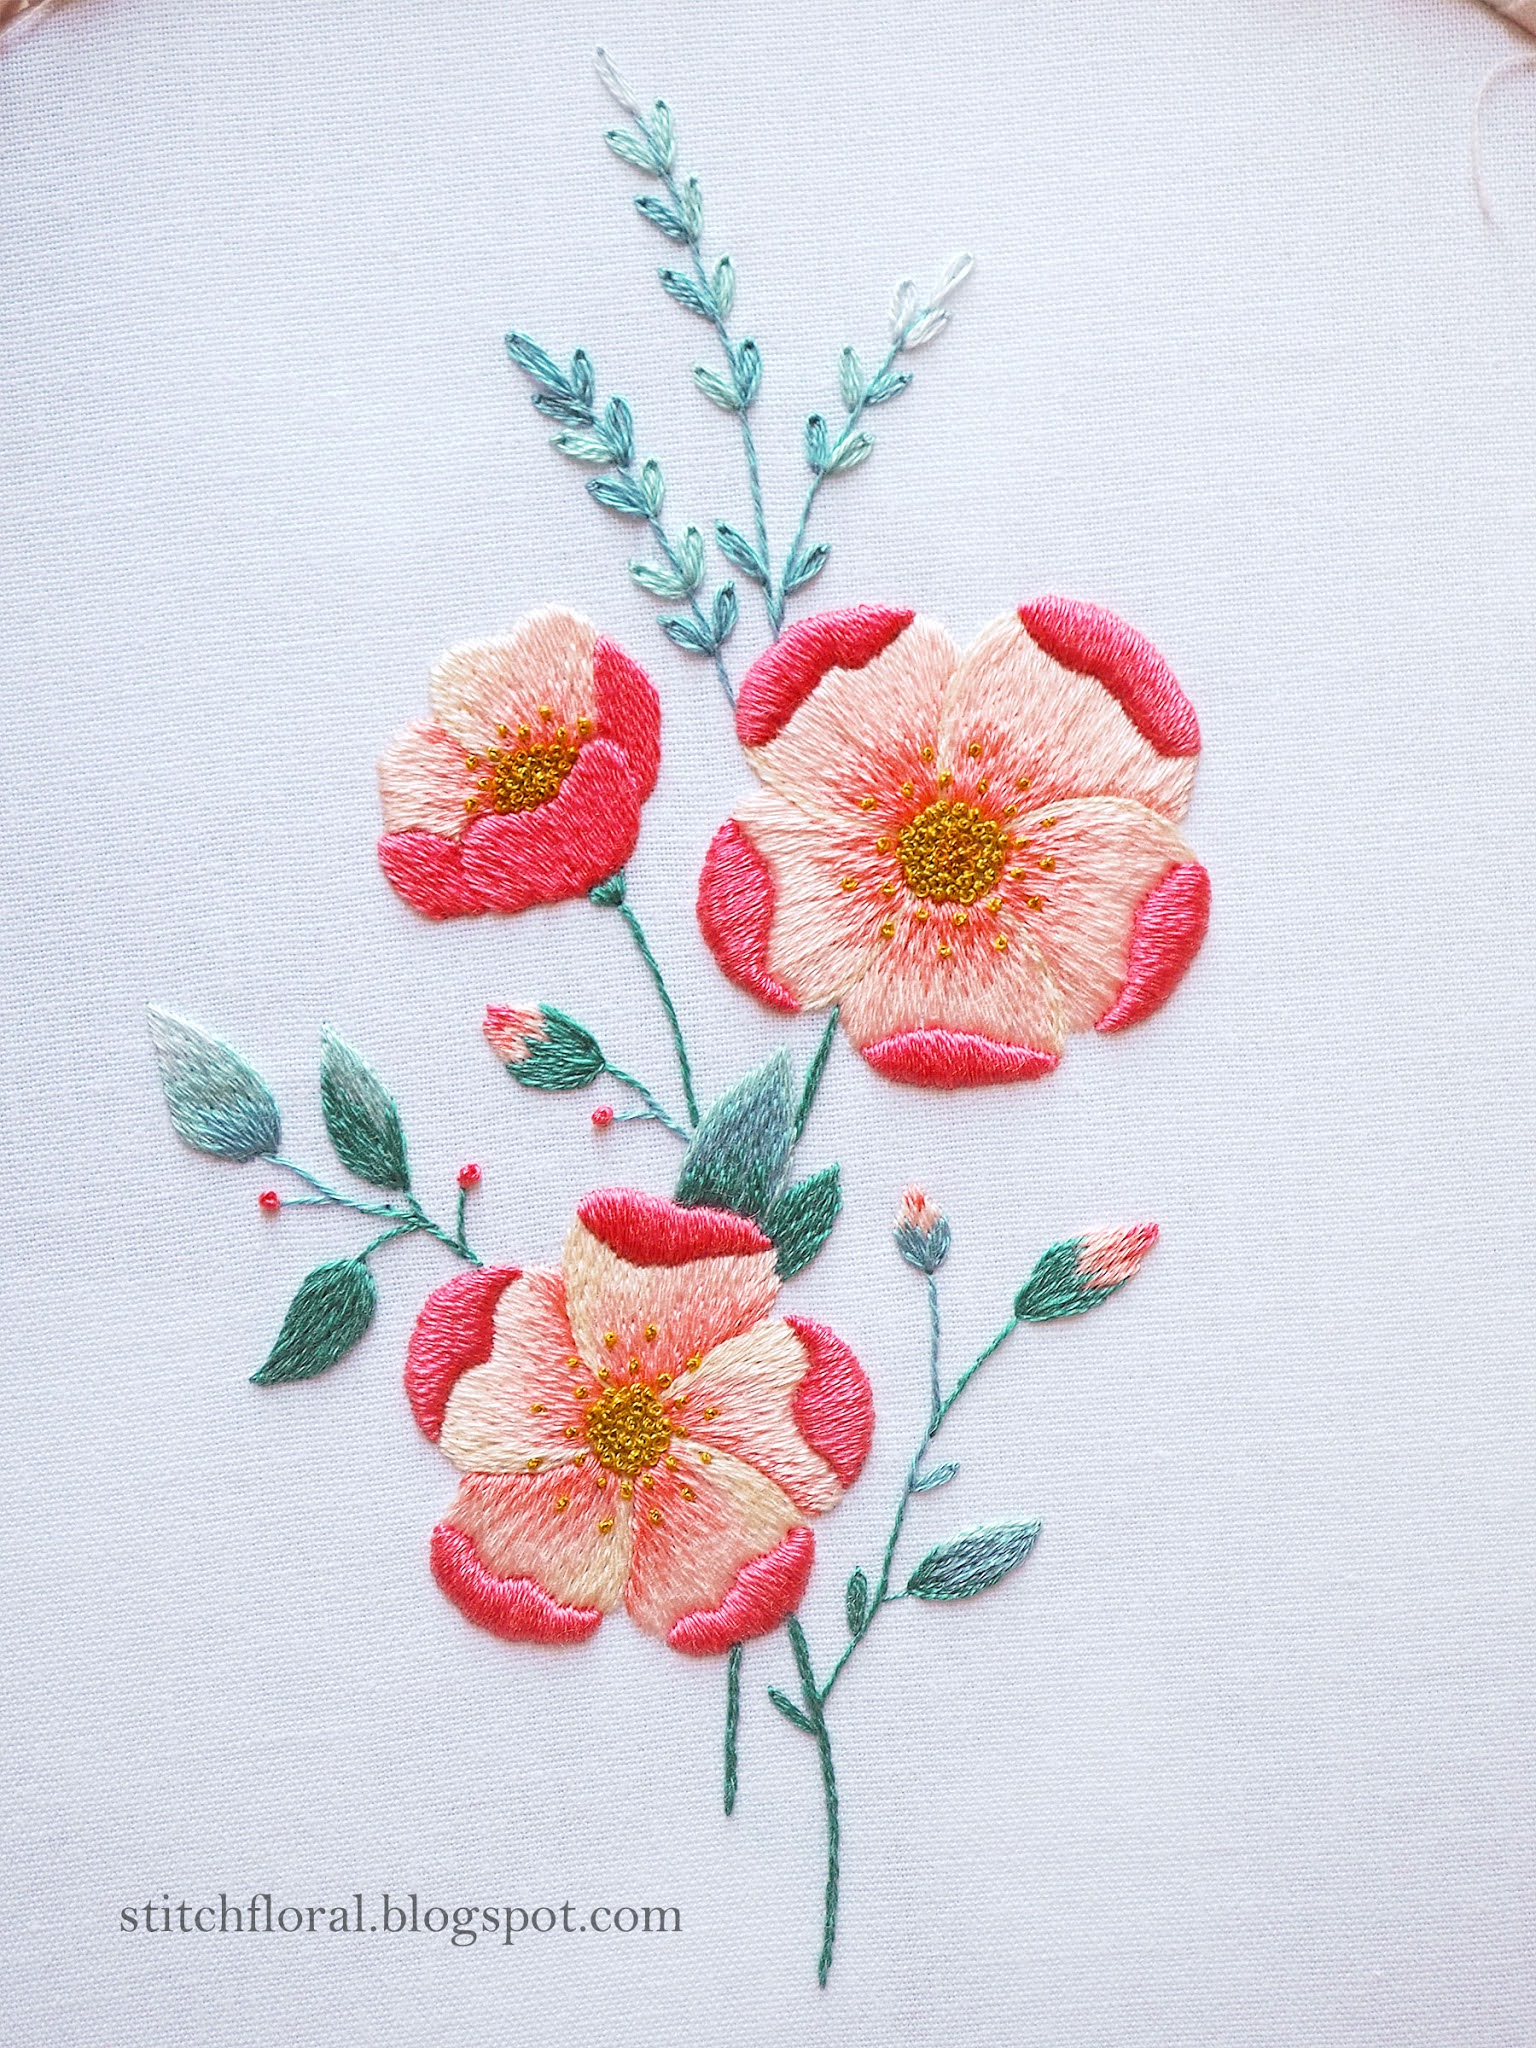
Finally! The last part of this stitch along! Let's finish this project which we have been working on, step by step, since last month. I've already seen some of your works, thank you so much for sharing them with me! You guys are doing amazing. Can't wait to see the final results :)
Now, without further ado, let's dive into the stitching.
The last part is all about the third flower. I suggest trying a diagonal long and short stitching for this flower, which is a tidbit more difficult than the regular up to down movement.
I've given a quick tutorial for diagonal long and short stitching in this post before, so it would be great to read it and maybe practice on a similar shape first.
The stitches and techniques we will be using in this part: outline stitch, long and short stitch, French knots, split stitch, satin stitch.
You can check out the previous parts here:
Let's go!
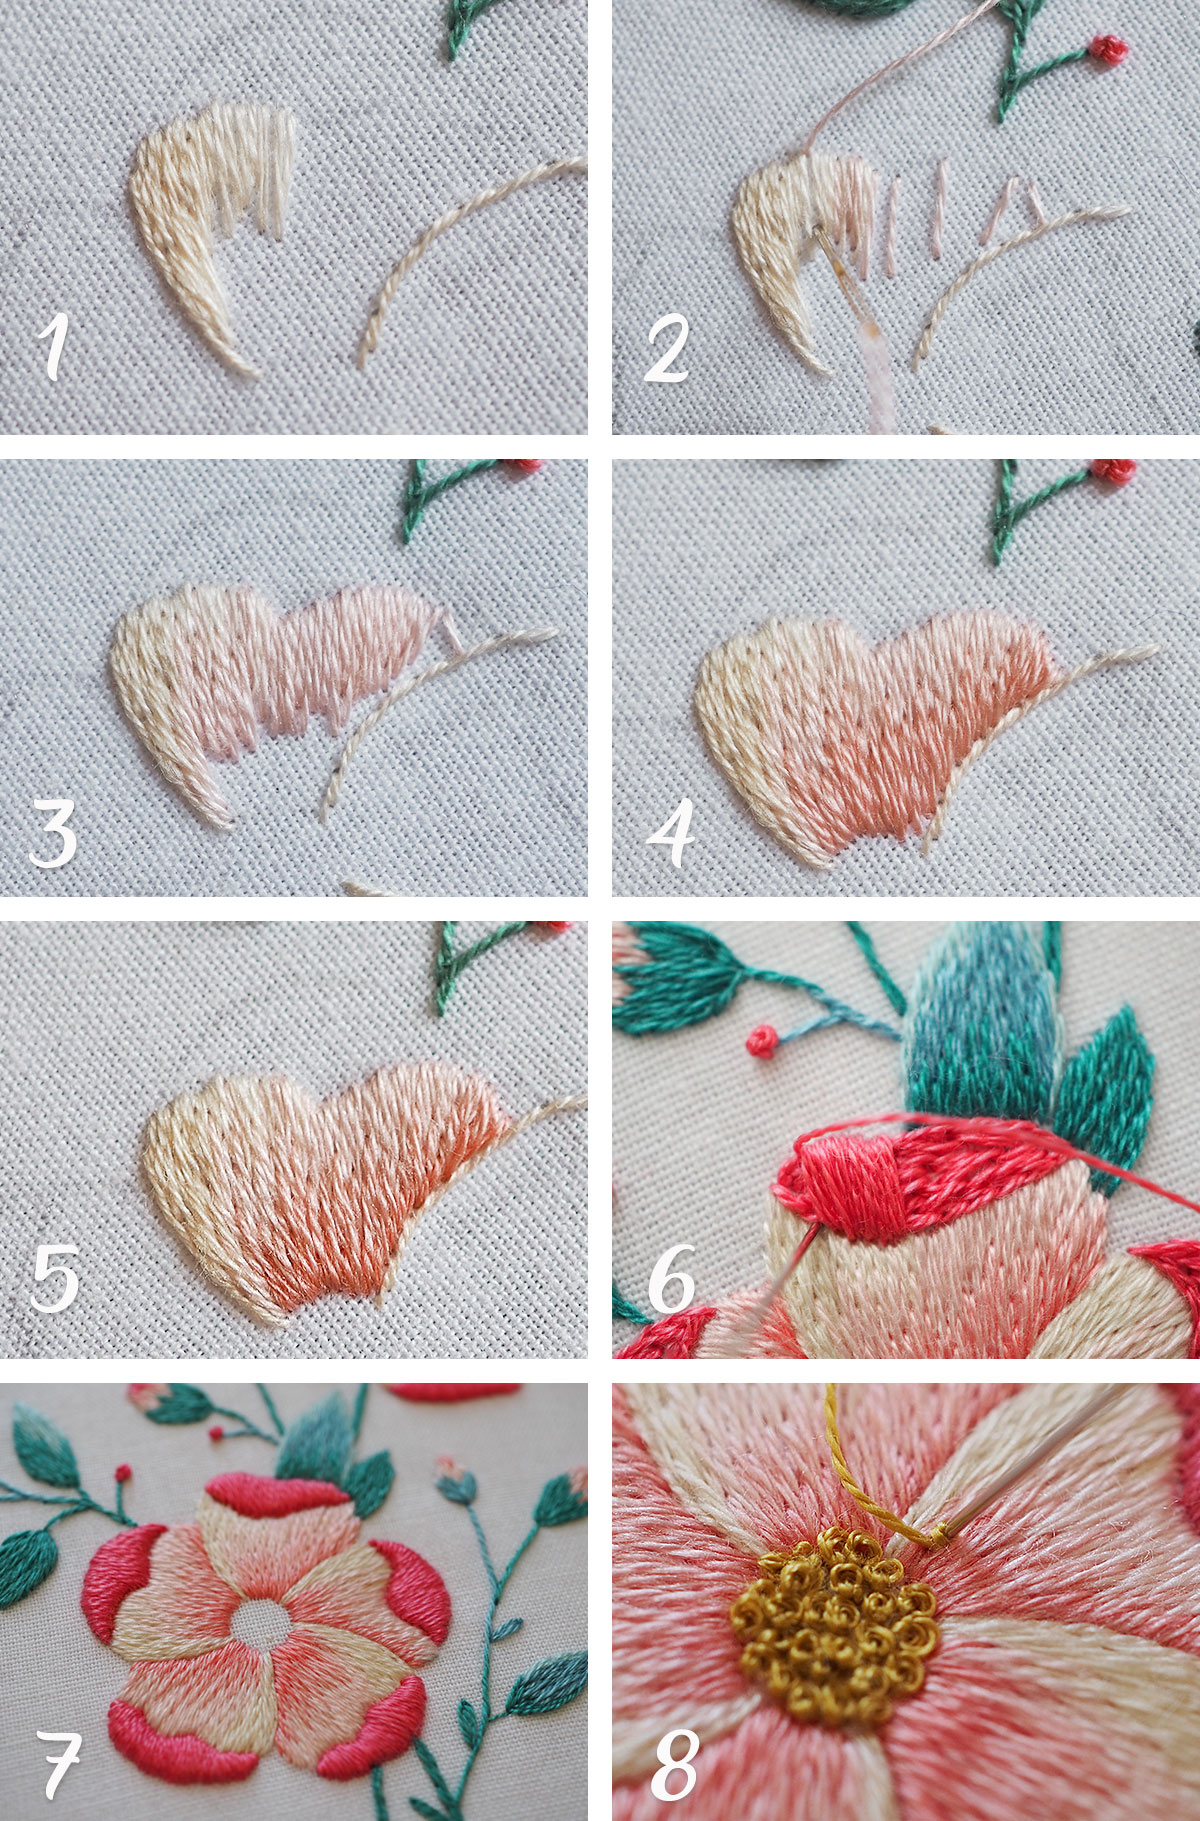
1). Use color A and outline stitch in 1 strand on the left sides of each petal. Then fill the left side with long and short stitching in this color, adding some more stitches at the top (the color is the same). The stitches at the top can be less dense than usually long and short stitching requires, because we are going to add some more stitches there.
2). Take color B, and start adding stitches at the to of the petal in the right corner (there is a stitch slanted in a different direction in that corner – please don't be confused, this stitch is outlining the shape so that I go over it with long and short stitches later. You can compare the second step to the step four, to see that it will be hidden later.
3). Add color B stitches to the top of the petal, mix them with the color A stitches on the top left, and work them over the color A area to the bottom left. It should remind a diagonal stripe.
4). Take color C, 1 strand in the needle and work one more diagonal stripe of color which should cover most of the petal until the bottom. You can leave some little space on the right enough for adding some extra stitches in the next color comfortably.
5). With color D we finish this petal – add some stitches to the right side next to the other petal, and to the very bottom of the petal.
6). Now, with color E in out needle, using 2 strands, we can work split stitch in the folded parts of the petals. After that, switch to 1 strand and work satin stitch. Everything is the same as in Part 2: it is recommended to start satin stitch a little away from the end and then gradually fill the both sides.
7). I corrected the shapes of the folded parts in the pattern only after I transferred the drawing to my fabric. So don't be surprised about any differences.
8). Lastly, let's fill the center of the flower with French knots in color G! Make 2 wraps for the knots in the center, and 1 wrap for the knots on the petals.
That's all!
Here's my gallery down below, and I'm looking forward to seeing your beautiful works :)


Hola Amina! Gracias miles por compartir tus conocimientos! Saludos desde el fin del mundo, Córdoba, Argentina.
ReplyDeleteC425TA-AJ0058
ReplyDeleteTop Selling Gaming Laptops
smartphones
best gaming mouse
HP Pavilion 15 Laptop
Best Travel Bags 2021
Top Mirrors In 2021
savingbuyers
Best OPPO Phones In 2021
Bluetooth and Wireless Speakers for 2021
Best Headphones For 2021
best phone for pubg
ReplyDeletePhones with best camera
OPPO Best Mid Range Phones
C433TA-AJ0044
Bông hoa bạn thêu rất đẹp, chỉ bạn cách thêu rất tuyệt , rất cảm ơn bạn Niềng răng và các thông tin hữu ích ?
ReplyDeleteGreat work thanks for sharing its really informative keep posting.Embroidery Patches In USA
ReplyDeletehttps://diligentdigitizing.com/
New World coins are currencies that players use to trade in New World.
ReplyDeleteAttached link: https://www.iggm.com/new-world-coins
It a very nice blogs if you want to know more about flower or want to order flowers online you should once visit us at :- Florist Doncaster One of the best service provider available in Australia
ReplyDeleteonline gifts to India
ReplyDeleteThis blog is really a great source of information for me.Thank you for sharing such a useful content about Clothing Embroidery
ReplyDeletehttps://testosteroneboosters2022.com/
ReplyDeleteI read this article of yours I loved it, I have also written Flowers name in Hindi like you
ReplyDeletethanks for sharing this is really helpful for us Best Furniture in Karachi Pakistan
ReplyDelete