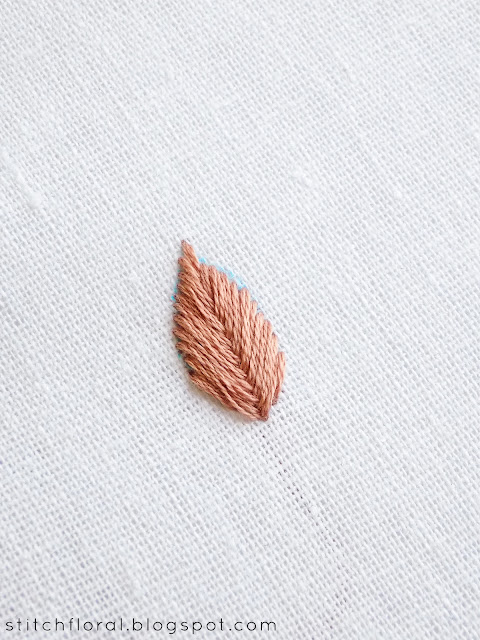
Fishbone stitch is one of the basic embroidery stitches out there, mainly used for working leaves and similar shapes. When you look at a fishbone-stitched leaf you might actually confuse it with satin stitch, because of a smooth look it creates. But there is something that sets the fishbone stitch apart - and that's the “spine”.
How to Fishbone stitch
Bring your needle up to the face of the fabric at the top point of the leaf shape (point 1) and make a straight stitch (point 2).
Now bring the needle up again, but slightly to the left side of the center (point 3) and make a diagonal straight stitch ending slightly to the right from the center (point 4). Please note: to the right of the center. This is important. This is what makes the fishbone stitch fishbone stitch!
Now repeat the same thing on the other side. Bring the needle up on the outline slightly to the right of the center (point 5) and insert the needle at a point to the left of the center (point 6). If you do it right you will notice that the stitches are crossing at the bottom.
Here's another angle to see the placement of the stitches more clearly. Notice that I'm inserting the needle at a point aligned to the ending point of the previous stitch. They are parallel.
Continue working the fishbone stitch in the same manner. Your stitches will keep crossing at the bottom which will create a “spine” effect. Try to insert the needle parallel to the points of the previous stitches.
Fill the leaf shape in this manner. If the angle of your stitches will be the same as mine here, you might come to the bottom point of the leaf shape while there is still some “unfilled” space left at the sides of the leaf (like the space to the left in the picture above). In this case, you can add few straight stitches to cover the remaining areas.
Our fishbone stitch leaf is complete now!
The distinctive feature of this stitch is the crossing of slanted stitched at their bottom. When you look at the result you can't see where the stitches end because they cover each other. It also creates a nice smooth surface which resembles satin stitch a little.
Fishbone stitch is usually used to fill in the leaves but is also suitable for stitching petals and feathers.
Tips
- If you increase the distance between your stitches, the “spine” will be more visible. And actually, it will be called an “open fishbone stitch”.
- You can make the very first stitch shorter and it will affect the angle your side stitch will slant. The shorter the first stitch the more horizontal the diagonal stitches will lie (does it make sense?)
- You really don't need to go far away from the center line when you make diagonal stitches. The bottom will be covered anyway, so insert the needle close to the central line to avoid wasting thread.
- Speaking of the central line, you might want to draw it with an erasable marker to make things easier.
- Again, speaking of the central line, who says it must lie exactly along the center? You can move it, curve it, slant it. Make things interesting for yourself ;)


Thank you. That was the best explanation I've seen.
ReplyDeleteMy pleasure :)
DeleteAgreed. You have a wonderful talent explaining how to make these stitches without having to watch video after video. Thank you, you've been a tremendous help in my experience learning how to embroider.
ReplyDeleteThat's the best compliment for me, thank you! :)
DeleteI wholeheartedly agree with the two folks above, your way of explaining this stitch is spot on! I'm fixing to dive into your blog and check out your other tutorials. Thank you for sharing your knowledge, truly priceless!
ReplyDeleteThank you so much! I'm happy you find it useful :)
DeleteThank you for the best explanation. But i just wonder what're the different between Fishbone stitch and Herringbone stitch?
ReplyDelete