Part 3 of the Needle Painting stitch along arrived! There won't be much text here because I already discussed the process and shared the necessary tips in the previous parts, and the steps are all the same. But still, I tried to capture the way of working the project with as many details as possible.
Posts you need to check out before proceeding:
So, now we start with the left pansy. There are only 3 shades of purple used to fill in all of the petals, and the order of using them is the same: light – darker – the darkest.
As always, we start with the top of the petal. I always make guiding stitches at this step, because it helps me to keep the direction of long and short stitches correct.
Completing the first row of stitches.
And adding darker purple shades on top of each other. I'm fast-forwarding these steps otherwise there will be too many pictures in the post, but I just want to add that when you work second and third layers of long and short stitching, you don't need guiding stitches anymore. The first row of stitches already gives you the correct direction, you just need to follow it.
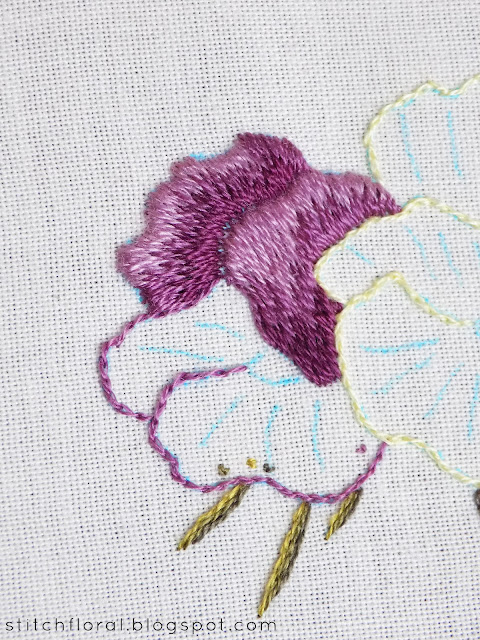
Next petal. Because it goes "deeper", you can notice few additional stitches there, to make it longer.
Complete. You might notice the fabric peeking out between the two petals. It's fine because we will have an outline later which will cover it (actually, it is easier to work an outline when there is a bit of “free” fabric). However, these things should be avoided in patterns where the outline is not included.
Third petal complete. I'm not really satisfied with it though, because it almost merged with the second one, haha. The shading outline really saved this situation and helped to separate them. Also, I left the edge quite sloppy and ragged because I knew the outline would cover it... Did I mention that I'm a lazy stitcher? You should know by now, haha!
Stitching the last petal. Actually, I always rotate the embroidery frame so that I'm able to work long and short stitching in a vertical position. It's more convenient that way :)
Long and short stitching for this flower is done! All that's left are few more details.
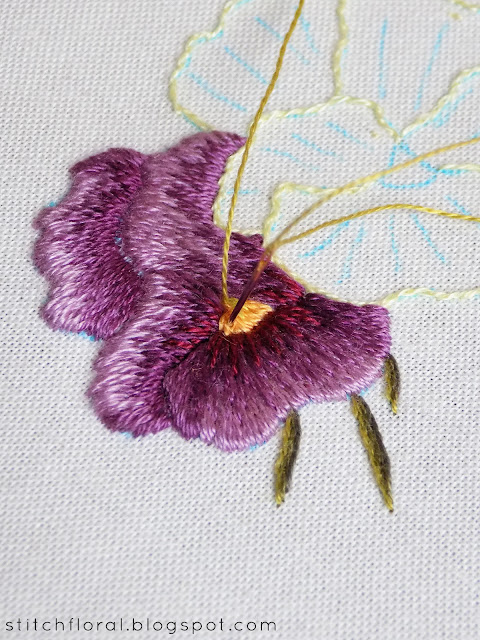
Adding few stitches of burgundy on top of the previous stitching in the base of few petals.
Now working the center of the flower: filling the triangle with orange shade first and throwing in some green stitches on top of it.
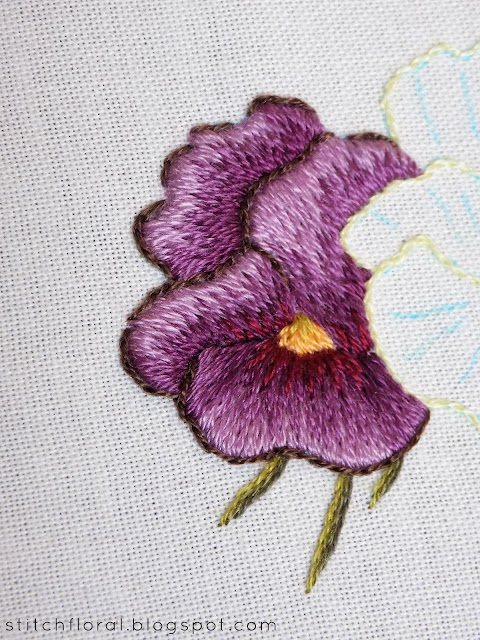
Now the shading outline in split back stitch. To be honest, it looks to me at least twice thicker than in Trish Burr's work... So, if you have an opportunity to source the correct sewing thread for this element, I'd recommend doing it.
And the finishing touch in the center worked in split back stitch again.
Done!
This flower took me longer to stitch, which is expected because the size and number of elements are bigger compared to the right one. Leaving aside the thick outline which almost makes me tear up, the rest looks satisfactory to me! But next time I will try to not be lazy and make the edges neater, haha.
Next part will be the last one and we shall work the flower in the middle. If you have any questions, please leave them in the comments section or message me through the contact form, so that I include the answers in the next part!
Upd:
Part 4
Upd:
Part 4


Wow. this is the easiest way to make this happen. Thanks for sharing
ReplyDeletesewing machine parts
How do you know where to end the lightest, first layer of stitching? How do you know how long to make those stitches?
ReplyDelete