Once your needlework is finished and you decided that you want to use it as a wall decoration, you have few options on how to do that: making it a hoop wall art, framing or mounting on a canvas. Today I prepared a tutorial for the latter one (this is a lengthy post, you were warned).
Mounting Hand Embroidery. Why?
So, why would you want to mount your needlework on a canvas? What are the benefits?
Honestly speaking, there are no profound advantages or benefits for this. And I won't say that it is something you definitely should do. As for me, I simply like how it looks, nothing more.
On the more practical side, if you haven't yet decided on how to frame it, but still want to keep it fancy – you could mount it on a canvas and then add a pretty frame to it when you feel like it. Actually, if you want to frame your needlework yourself, you will have to mount it on a piece of cardboard anyway so this tutorial will be useful as well.
The process of mounting might seem tedious for some people and I can't promise any fun and rainbows. It really is a rather monotonous thing to do. But after you do it once, every next time the process will go smoother and quicker, and if you are bored you can just listen to something or watch a favorite show in the background.
Preparation stage
The materials and instruments you will need:
- your finished needlework
- cardboard canvas
- sewing thread and a needle
- pins
- paper clips
- ruler
- scissors
For the cardboard, you can use various items, actually. I buy a ready art canvas, already with cotton on it and already coated. It is hard enough, it doesn't bend and it has a white base. You can buy these in art shops, they are also called “canvas panels” and “canvas boards”. They are ready to use for mounting but they have fixed sizes.
Another option is a foam board which you can cut yourself to the desired size. Don't forget to use a cutting mat and be careful with the craft knife!
The things you must do before mounting your needlework.
- Prepare the needlework itself. If necessary, wash it and iron it. If there is some puckering which is hard to get rid of, don't worry, it will disappear after the mounting. Also, think about the edges of the fabric – does it fray easily? If it does, you need to strengthen them. The best way would be to use an overlocker if you have one. However, if you are not into sewing, chances are you don't have it – then you can use the zigzag stitch on your sewing machine. If you don't have a sewing machine, you can use any light glue, just smudging it over the edges of fabric slightly. BUT strengthen the edges only after you cut the fabric to the necessary size for mounting (see the steps below).
- Prepare the workplace. You need a hard top for the process to be convenient, so a table would be a fitting solution. Make sure it is clean! You will have to flip your embroidery face down a lot of times, so your table mustn't have any dirt or it will spoil your work :(
I guess that's all. Oh, you should check out the tutorial for the invisible stitch if you don't know how to work it yet because we are going to use it.
Now let's start.
How to mount hand embroidery:
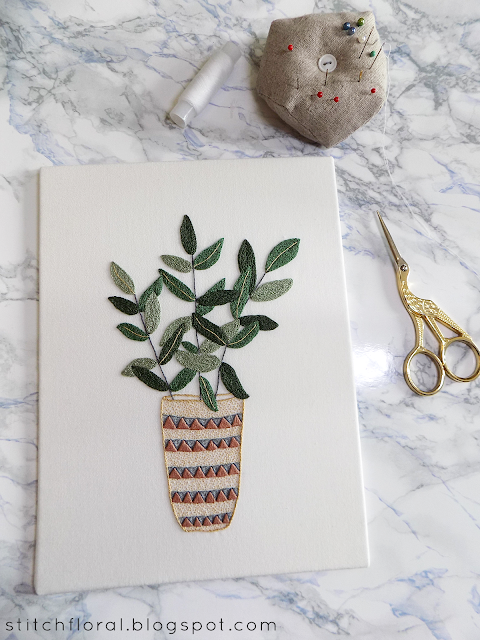
1. First, you need to center your needlework the right way. Don't hurry and measure everything ten times if needed (have I already mentioned that it can be tedious?). The distance between the lowest and highest points and the edges, and the distance between the rightmost and leftmost points and the edges should be equal. Well, I rarely get it 100% perfect, most of the times there will be inaccuracy of a couple of millimeters and I let it be. But more than that would be already noticeable, so measure carefully!
By the way, can you notice the puckering here? It's not very noticeable because the picture is bright, but there is puckering at the base of the pot and around the leaves at the top. You will see how it disappears after mounting.
2 After that fold the fabric around the corners and fix it in place using the paperclips. What we need right now are the sharper creases so we won't lose the corners after we centered the needlework. It is better to wait just a little bit so that the fabric “memorizes” the creases.
3. As you can see the folds are too big. It is better to cut them shorter – 2,5 -3 cm (around 1 inch) would be perfect. First of all, these heavy folds are just not very comfortable to work with. Secondly, it will be harder to achieve a good tension and get rid of puckering with bigger folds.
4. Now when you take off the clips, thanks to the creases you can still find the right corners even when you flip embroidery face down. I cut the edges on each side at this point.
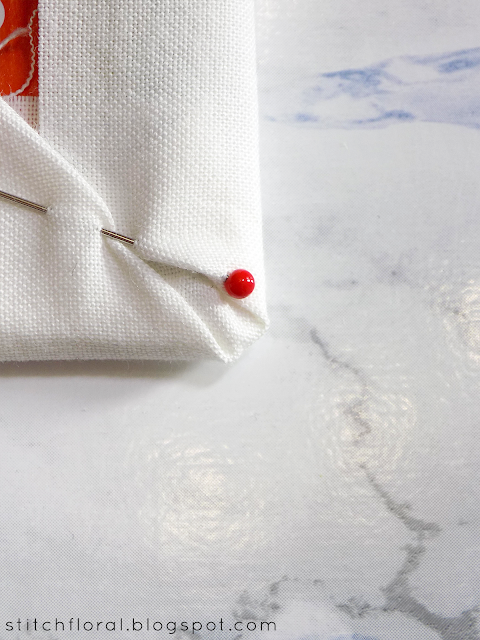
5. Flip the fabric together with the board face down. Now we will take care of the corners and miter them to make what I call pockets. First, fold the corner at 90° angle.
6. Fold the two creases at 45° so that they form a diagonal line. Yes, it is often practically impossible to achieve that – it is normal! Just try to put these two sides as close to each other as possible. Then pin them together to keep in the place.
Repeat this step with the other 3 corners and then turn the needlework back face up and check if it is still centered correctly. If everything is okay proceed to the next step.
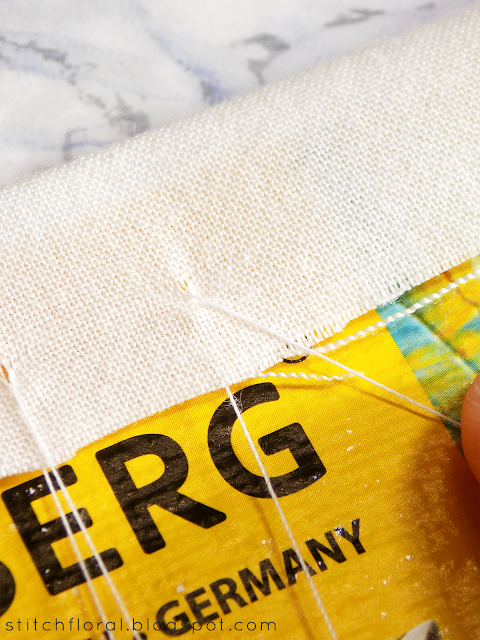
7. Now we will sew the creases together. We will work the invisible stitch here so make sure you know it. I prefer using sewing thread here, because I think it is stronger and well, I'm saving my floss for embroidery purposes, haha.
Make a knot at the end of the thread and bring it up through the fabric on the edge of one of the creases. Then go to the other side of the crease and grab a bit of fabric with your needle.
8. Go to the other side and grab a bit of fabric again.
9. Pull the thread as tight as possible, bringing the two creases close to each other. Stitch a little further but not necessarily until the very end of the edges. Pull the thread tight after every stitch.
10. Repeat for every corner. Now your needlework is put in the corner “pockets”! But the sides are still baggy, so now we will take care of them.
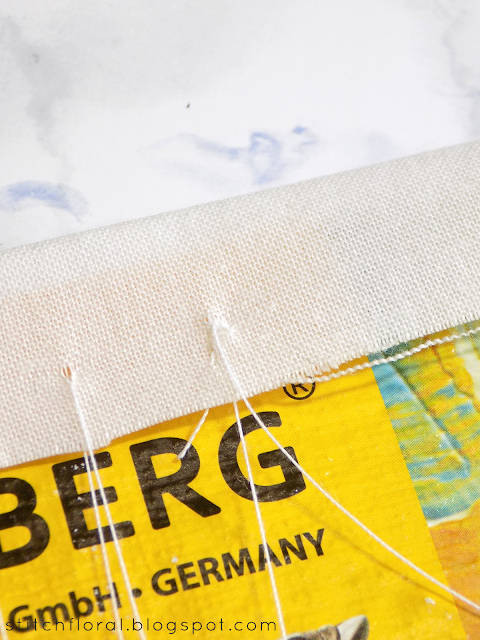
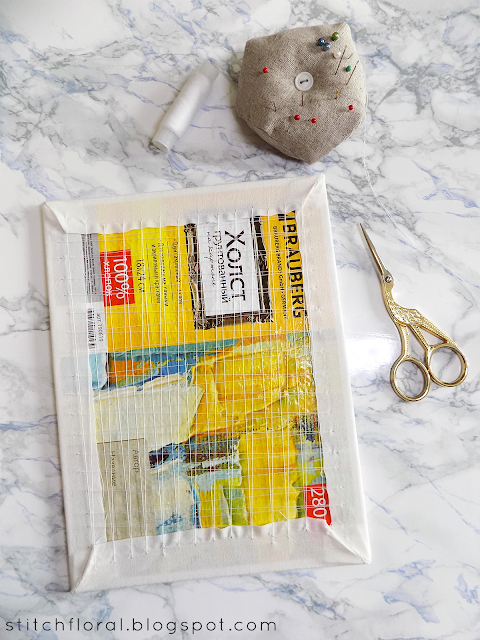
11. It is time for the lacing part. Make a knot at the end of the thread (speaking of which, I recommend having a rather long thread if you don't want to end and start it many times). Come up through the fabric at one of the sides then pierce the fabric on the other side and puuuull the thread as tight as possible. You might notice a distortion of fabric where you pull it – it is okay, it means the tension is right on spot.
Also, this is why the fabric shouldn't be fraying. I'm using cotton muslin here, it almost doesn't fray, so I didn't need to strengthen the edges at all. But if your fabric does fray, then better to strengthen them. Also, pierce the fabric somewhere in the middle of the fold, far enough from the edge.
12. If your thread ended before you reached the end of the side, make a couple of stitches while pulling the thread so that the tension doesn't weaken.
13. However, let's be real, it will still weaken to an extent. So that's why when you start a new thread, come up right above the place where you ended the previous one. And continue lacing.
14. The final result. I forgot to mention that during the lacing a few stitches (I don't know how else to call it, haha) won't be enough! Make plenty of them and place them near each other, so that the tension is high and even on all sides.
15. The new face of your needlework.
Notice how the puckering is gone. Magic!
So, how was it? Complicated much? Well, it seems like that, but after you try it you might even find the monotony of this process a little charming. It is a little soothing. Or is it just me??
Anyway, in my mind, this is the example when the effort is worth the result :)
Also, I'd like to say that I don't claim that this method of mounting is the only correct way. This is just my way. I learned by others' tutorials too, and after trying this and that, this is the final method that has worked for me. So, before trying for the first time, maybe you'd want to read others' take on it as well and see what works best for you!







Good tutorial..
ReplyDeleteThanks :)
DeleteThis is so helpful! I've been looking for ideas as to what to do with my finished embroidery - I knew I wanted to display it, but I had no idea how to do so. Thanks so much for the tutorial - I'm off to try it right now!
ReplyDeleteYou're welcome! :)
DeleteAnother thing to consider, which I learned during my years working with graphic designers, if you make the bottom margin just a little bigger than the top margin it is very pleasing to the eye. So for example if the top white space is 2 inches, the bottom white space could easily by 2.5 inches. That little extra weight at the bottom often improves the overall look.
ReplyDeleteOh, really? I would never think that way, it always seemed otherwise to me :D I would think it's more pleasing to the eye when there's a bit more white space from the top. So interesting!
DeleteI am so happy that I happened upon this method. I was struggling to get my embroidery looking just right and this method solved the problem. Thank you for sharing it.
ReplyDeleteHello Dear Amina,
ReplyDeleteDo you frame your work after doing this process and should I put it under glass? Thank you so very much for everything you do for us!
Marie Keough