Within the next few days, we are going to learn some new stitches here on the blog! It is time to conquer the chain stitch family which has TONS of stitches based on it and its combinations. Just when I think I've seen it all, I find some new ones! But to not make this journey too lengthy and to make all this new information simpler to digest, I broke the new stitches into groups. So today is the day of zig-zag and feathered chain stitch!
If you don't know yet how to work chain stitch, here are some posts that will help you:
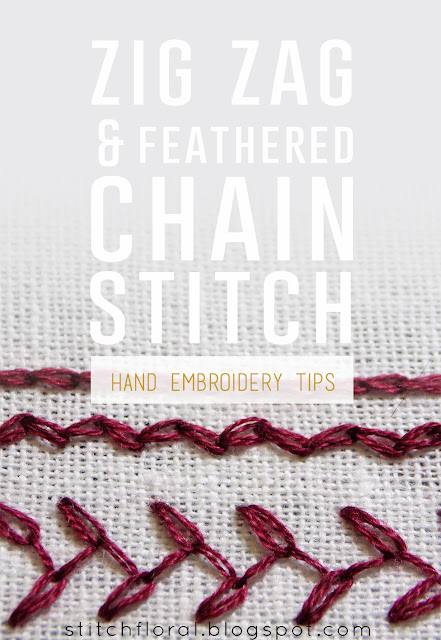
I actually worked a line of simple chain stitch at the top with zig zag and feathered ones below, so that you can see the difference.
Now, without further ado, let's jump to the stitches!
Zig zag chain stitch
To make zig zag chain stitch you need to draw two parallel lines. Be aware, though, that they won't be fully covered, so it is better to use erasable markers which don't leave any trace after they are washed away. Or, if you are using cotton or linen with clearly visible holes as a ground fabric, then you can just follow the lines of the fibers weave – that's how I'm doing it in the pictures. Or you could just imagine the lines in your head :)
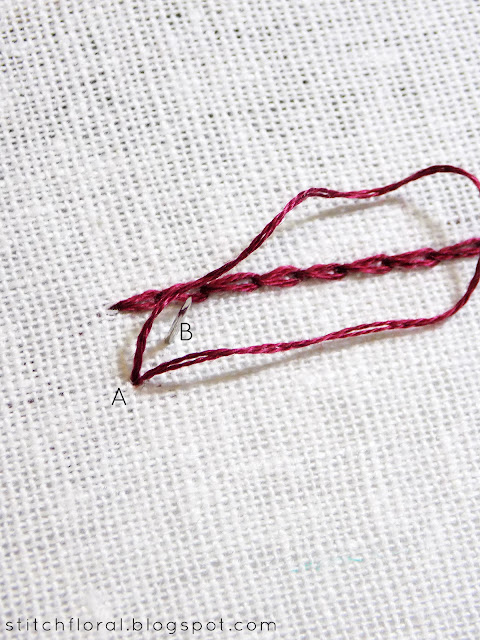
So, the first step would be bringing your threaded needle at point A and inserting it at the same point, but not pulling through till the end. Instead, leave a loop on the surface of the fabric and come up through the fabric at point B with the needle point inside the loop. Ponts A and B should lie on two different parallel lines.
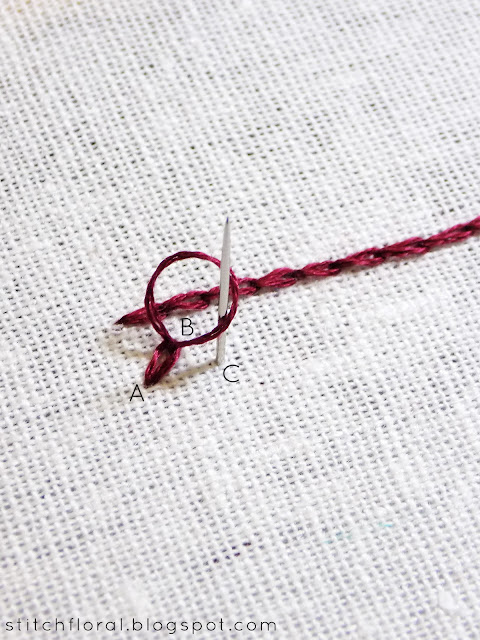
After that, insert the needle at B again, right where it emerged from and create another loop. Don't pull it all the way yet.
Bring the needle at point C (which lies on the same line as A), inside the previous loop.
Go back to where the needle emerged from again, make another loop and come up at the next point which will lie where? Right, on the same line with B.
The last chain link will be anchored with a tiny straight stitch.
Feathered chain stitch
For the feathered chain stitch, I recommend reading the following post because it is a combination of chain stitch and feather stitch, so it's better to be aware how it works.
We will be placing chain links at an angle on two sides and between them there will be.. sort of bridges? So, ideally, you should have 4 parallel lines in mind (or have them drawn with an erasable marker) that you will follow, if you want the stitch to be even on sides.
Also, unlike zig zag chain stitch, the feathered chain stitch is more convenient to work vertically from the top to the bottom.
We start by bringing the needle through to the front at A and inserting at the same point or very near. The needle then emerges at point B, at an angle, a stitch length away.
Stepping a little aside and down we pick another bit of fabric of a stitch length, inserting the needle at C and emerging to the front at D.
We form another loop bringing the needle down at D and coming up at C again.
Step a little aside and down again and pick a bit of fabric between points E and F. Notice how E lies on the same line as B and F lies on the same line as A.
Make a loop and bring the needle up through the fabric at E inside the loop, then take a step down again and make a new stitch, parallel to the DC one. Continue following the previous steps to work the feathered chain stitch.
These stitches are very often used in crazy quilting as they perform perfectly as pretty borders. You can add beads or small french knots in the center of each chain link or weave them like here and they will look more like leaves!
I think using them as an open filler would also be exciting. I saw an example in one of the books where they worked feathered chain stitch as vertical borders on a pot. So, that's also an idea to keep in mind :)
Next time we will take a look at the heavy chain stitch and braided chain stitch – my two favorites! See you!


No comments
Write what you think! ❤
Note: Only a member of this blog may post a comment.