This is the last stitch lesson in this month and also, the longest one. It's because we are going to take a look not just at one stitch, but a whole family, learning various types of thread couching!
Couching is a common technique in hand embroidery and has both functional and decorative purposes.
If you have a thick thread, cord, string, wire, metal thread that you want to attach to the fabric, you can couch it, using additional thread and making small straight stitches across it. This way, you fasten the laid thread to the material.
So, where would you use couching?
Frankly speaking, it can be a substitute for many straight stitches if you need to work an outline for your embroidery design and don't want to bother too much. Just take a thicker thread (if you're using floss, then just increase the number of strands) and then use a thread of a complementary or contrasting color to couch it. You can work the whole outline much quicker compared to many line stitches. And it also will look pretty :)
There are also functional uses of couching. In goldwork, for example, where metal threads are widely used, they have to be couched to be held in position. Goldwork artists, however, manage to turn this functional use into a decorative as well and create wonderful shading effects by changing the intervals between the couching stitches. It looks really lovely!
There are also certain “genres” of embroidery which apply couching heavily – like braid work and laid work. But it is really hard to find modern examples for them, I've only seen the mentions in some vintage embroidery books, to be honest.
Basic couching
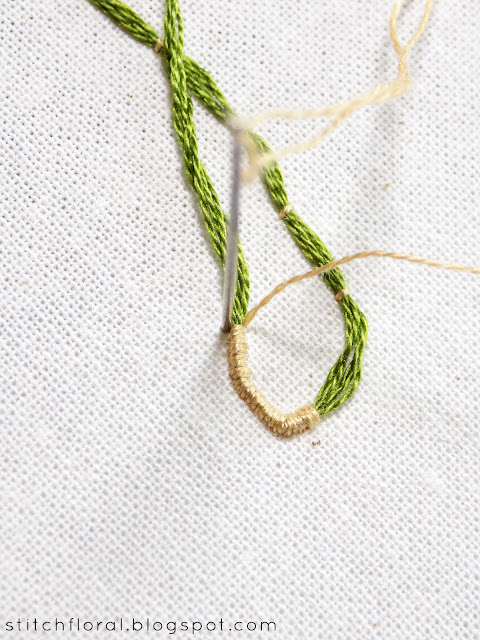
For the basic couching, you need to have a laid thread (the one that will be attached to the fabric) and the working thread. Bring the laid thread through the fabric at the start of the line or outline, then bring the working thread in the place where the first couching stitch will be done.
Make straight stitches to couch the laid thread. You can do that in a perfectly straight line, or curves or any form of linear design. You can also vary the intervals of the couching stitches to create a certain pattern – like the shading effect in goldwork that I talked about above.
The laid thread can be thinner. It can also be some kind of decorative thread (like metal thread) or cord.
Trailing
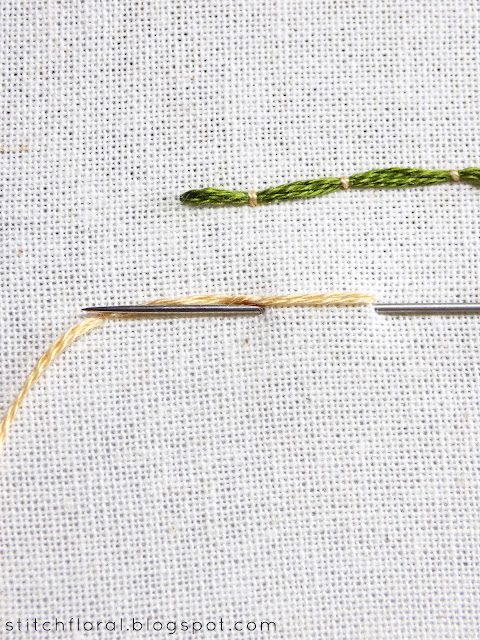
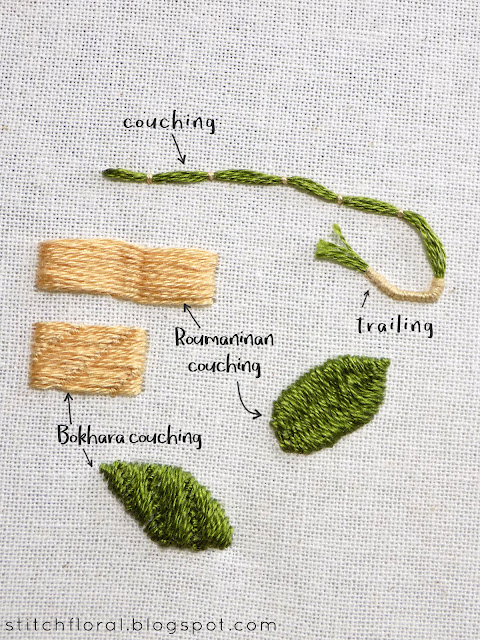
Trailing is an excessive way of couching, when you lay the couching stitches very close to each other, like in satin stitch.
This way of couching creates a dimensional cord which you can place in whatever manner you want. It requires more effort and time than the basic couching, but the effect is worth it.
Roumanian couching
Roumanian (or Romanian) couching is a type of self couching – when the length of the working thread is being couched on itself. It is a filling stitch, just like satin stitch, but with its own charm. To be precise, it creates a gentle “wave” effect :)
We work Romanian couching in horizontal lines. Bring the needle up at the starting oiint and make a horizontal straight stitch at the full length of the shape. Then bring the needle back up close to the middle of the horizontal line, over the thread.
Insert the needle under the first stitch, close to the middle as well, but a bit to the side. This way your couching stitch will be prolonged and slanted. Then bring the needle out at the edge of the shape.
Now repeat the first step and continue working the couching.
As you continue, the filling will have this gently wave in the middle. Be sure to make your couching stitches longer than in the basic couching and slant them to achieve this wavy effect.
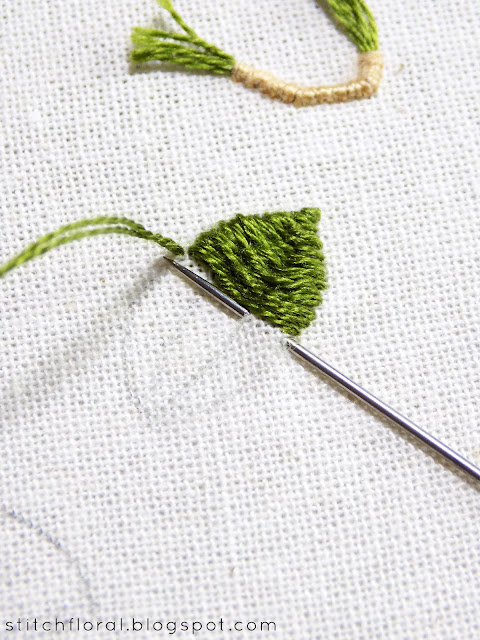
You can also work leaf shapes in this way. At the tip of the leaf make a couple of straight tiny stitches to make it sharp, and start with the couching only with the 3rd or 4th of the stitches. Also, it is better to mark the lines for the couching stitches, like in the picture above, it will help to keep the look consistent.
Bokhara couching
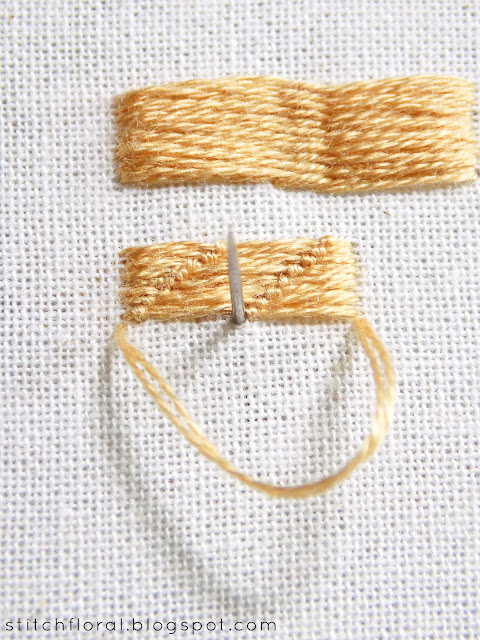
Bokahara couching is a type of self-couching as well, but closer to the basic one because the couching stitches are the same tiny perpendicular ones. The difference is that with these couching stitches you can make a pattern.
Make a horizontal stitch and and then bring the needle out on the line of the stitch so that you can make a straight couching stitch.
Then make one more couching stitch (it is optional).
With every next “base” stitch, when you make the couching stitches, take a step to the side, so that they create a pattern. In this case, I took a step to the left every time I made couching stitches, so it created stripes.
Here's how it will look when finished.
With Bokhara couching you can create various diagonal patterns. And if you want to fill in some shape and give it a striped look, this technique will fit perfectly.
When you work Bokhara couching on a shape, it is better to mark the lines for a neater look.
So, here are the couching methods we learned today. There are some others, but for now, I think it is enough information to process :)











It is super useful, thank you so much~
ReplyDeleteIm embroidering a logo, would this stitch work for the empty space inside?
ReplyDelete