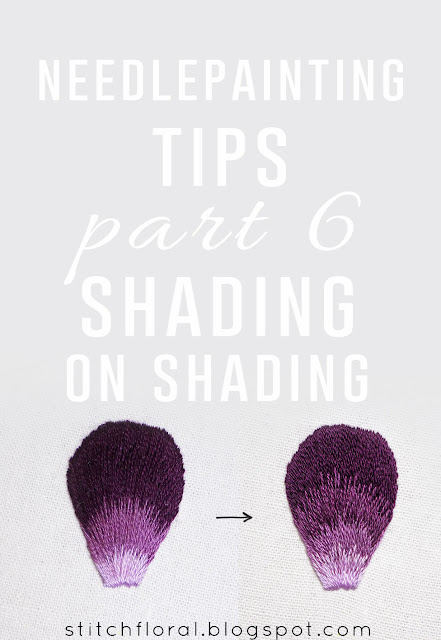
And the new portion of needlepainting tips has arrived! This time let's take a look at an “alternative method” of long and short stitching!
I stumbled upon this method not a long time ago. Frankly speaking, I've never seen it anywhere before (and I've examined quite a number of sources ever since I began stitching) and only accidentally bumped into it in summer, I think.
This method was presented as one of the ways for long and short stitching, but, personally, I disagree to an extent and have my own thoughts on this “method”. But let me share the tutorial first and then we will discuss it :)
Tutorial
To put it simply, in this method you use 2-3 (numbers are debatable, that's just an example) colors of thread to fill a shape in long and short stitch. Then you add extra colors in between the existing rows of colors. So, for example, you can use 2 colors and then add 1 between them. Or 3 colors and add 2 more, each one between the original “foundation” rows.
Let's take a closer look to understand better.
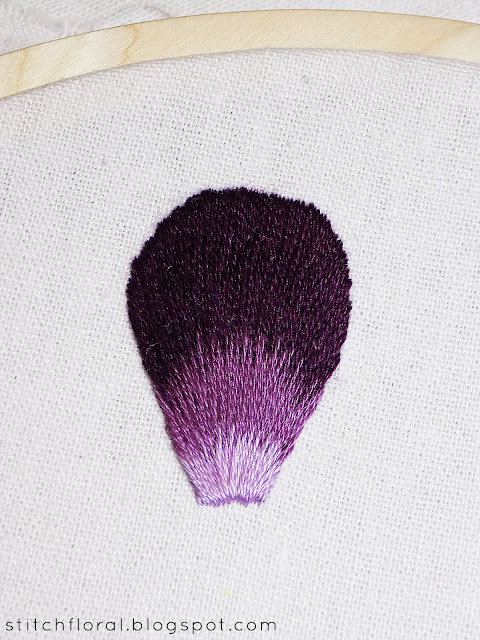
So, the first thing we do is actually fill the shape with the long and short stitch using “foundation” colors. As you see, the colors here are pretty far from each other in tints, so the border between them is very evident. I already talked about how hues and tints can affect the shading in needlepainting in this post, so check it out if you haven't yet.
Next, we need to add a couple of extra colors to the existing long and short stitching, using the tints that fit in between the base colors.
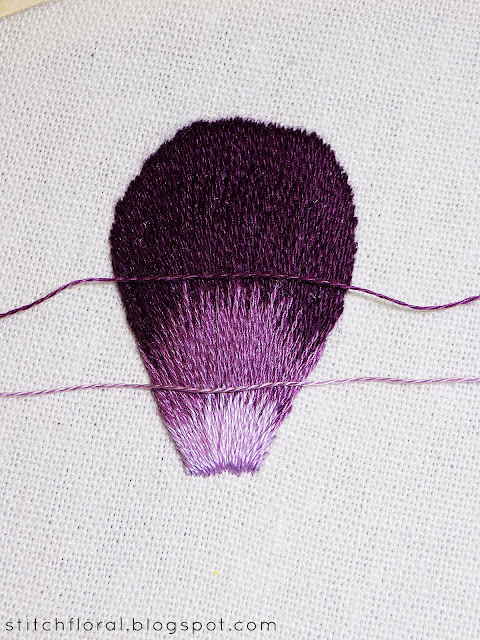
Now, a bit of technical side. You know the importance of keeping the same direction when you work long and short stitch, right? So, to not go astray in your stitches, I recommend working a few guidelines first.
And then fill in the gaps between the guiding stitches. Now that your stitches are out on the surface and won't be covered by the next row, make sure to vary them well at the bottom.
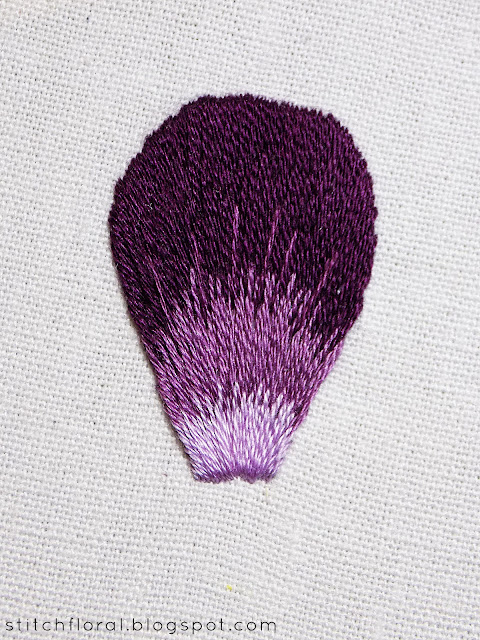
So, here is our first extra row of stitches. I worked the full row with stitches close tight together as I would usually do in typical long and short stitching.
But with the second extra row, I just added stray stitches here and there and let them mix in naturally.
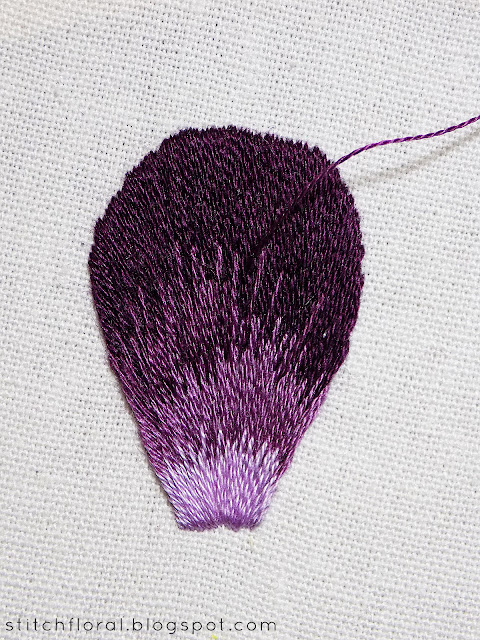
The reason why I did the two “extra” rows differently, is to show you how the surface of the stitching looks after adding them. The first extra row now kind of “bulges out”, if you know what I mean. It sticks out and you can see well that the stitches were made on top of the previous layer of stitching. While the second “extra” row lies flat and doesn't stick out in any way.
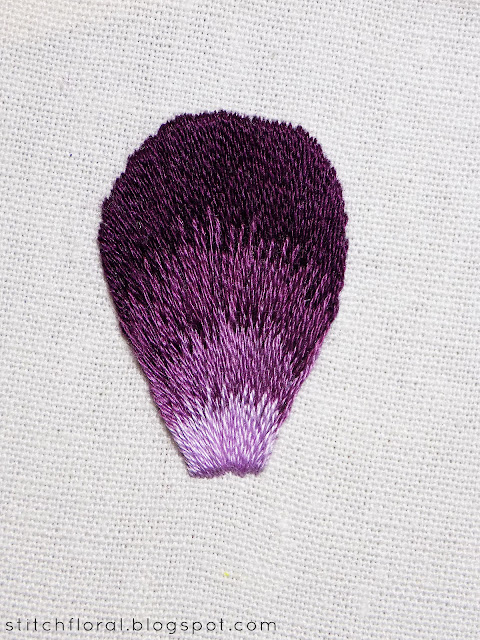
Here's the final result.
Let's discuss
As it is one of the “methods” of long and short stitching, I felt the need to speak about it. But truth be told, I don't see any real value in it apart from a few occasions.
Mainly, when you have a difficult shading project in your mind and you know what the “base” colors would be, but you are still not sure about the additional finer hues you're going to add. Like in painting, when you lay some base colors and then add more and more brush strokes carving out the details.
But even in such cases, it is probably more of the situation with the second extra row, where you add some stitches randomly here and there to enrich the palette and smoothen the blending. Which, again, I can hardly call an “alternative long and short stitch method”. Just a simple side technique.
Otherwise, if you already know the colors you are going to use, if you have the map of shading planned in your head, I would NOT recommend using this method.
The cons are:
- The extra rows you work will probably stick out.
- It will be difficult to maintain the direction of stitches through all of the rows. If you went just a little astray in your second and third rows of the “foundation”, it still might be not as noticeable. You can let it slide. But if a new row comes in between the two when they are already not perfectly aligned, it's going to make things look chaotic.
- Lastly, you simply waste your thread? Why would you need to make longer rows of “base” colors which will be later covered, if you can just go row by row in a more organic way and spend exactly as much thread on each row as necessary.
Sorry if this post was not as helpful as you'd expect and doesn't have any new tips. But if you look closely, you can draw some useful conclusions from this article for your needlepainting!
I guess the main tip of this post would be to pass by unnecessary “alternative methods”, haha.
Not all of the alternative methods are useless, though! Just try things out and analyze, think whether this or that technique is worth it. I was pretty excited to discover this method because I've never met an “alternative way” of long and short stitching. But as I tried it, I realized why it was my first time hearing about that and why I've never seen it before, haha.
Or another casual tip: try to maintain an even surface of your long and short stitching by avoiding throwing in a “patch” of closely situated new stitches on top of the existing ones. Maybe my images don't reflect it that well, but when stitches bulge out it is really visible and spoils the smoothness of shading.
Okay, I promise to make the next post contain the real tips! Meanwhile, share if you have any troubles or questions about long and short stitching and needlepainting. If I haven't written about it before, I might make a post to help you solve it!


No comments
Write what you think! ❤
Note: Only a member of this blog may post a comment.