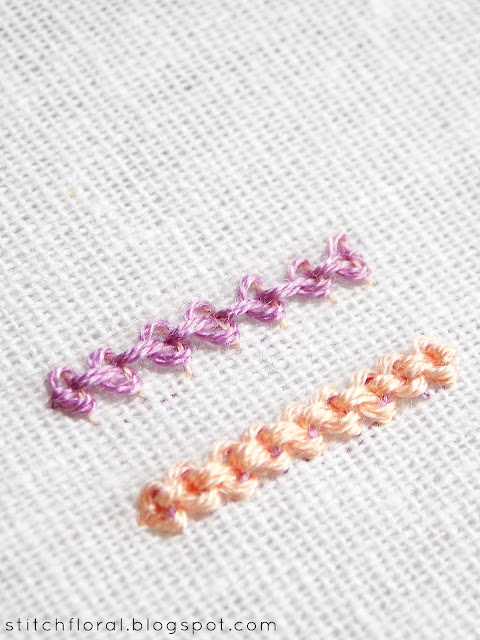
Hi, here's a new stitch tutorial! Today we are taking a look at a dimensional raised chain stitch.
This is actually an awesome line stitch, which can be worked both as a straight border or on curves. It is not very thin though so it would be difficult to tackle tight curves. Otherwise, it looks striking in a very good way.
Again, the appearance of raised chain stitch might differ depending on your approach to working it, but mainly it depends on the thickness of thread. You will see it later more clearly.
Before proceeding to the tutorial you might want to check out the following posts:
And the posts from the March marathon:
How to work raised chain stitch
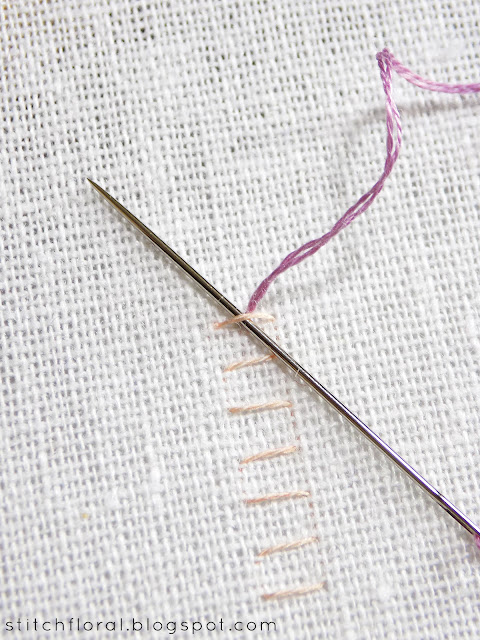
1. First, we lay a foundation of short parallel stitches. The width of these stitches will decide the total width of the raised chain stitch line.
2. Next, we bring the needle up to the surface of the fabric at the point above the center of the first stitch. And slide the needle under it, the point of the needle facing upwards.
3. Now slide the needle the same stitch, tucking the free end of thread under its shaft, but now the point of the needle would be facing downwards.
(Also my needle here looks weird, although it was new... maybe it's because of the lamplight because at other angles it looks normal, hm...)
4. After all the previous manipulations you end up with a complete chain link. Note that starting from the second step the needle doesn't go to the backside of the fabric at all!
5. To start a new chain link we slide the needle under another foundation stitch with the point of the needle facing upwards (like in step 2).
6. And then slide the needle back down under the same stitch tucking the free end of thread under the needle shaft (like in step 3).
7. Keep repeating the steps until you finish the line. The last chain link will be anchored by a tiny straight stitch.
In my first example here the raised chain stitch looks a bit “bony” because I used 2 strands of floss and because of the distance between the foundation stitches. But here's how it can actually look like if you use 4 strands of floss and decrease the distance between the foundation stitches:
Pretty, right?
So you can choose the variant you like more. The raised chain stitch usually can be worked quite quickly because we don't go to the backside and all of the manipulations are done on the face of the fabric.
One tip that you might find useful, though, is to use a needle with a blunt point which would help you avoid picking the thread fibers as you move the needle around. Or, you can slide the needle under the stitches with the eye forward :)
That's all for today, see you next time!


No comments
Write what you think! ❤
Note: Only a member of this blog may post a comment.