Here's the last tutorial for this month' ribbon embroidery festival! Today we will work a lovely flower and color it using watercolors.
We already looked at the process of coloring ribbons after cutting them yourself out of a length of silk fabric/scarf. So you can prepare them in advance to use later in your project like I did with forget-me-nots and tulip tutorials.
But there is another way!
You can also work your project first, using a white/ cream or any light colored ribbons, and then color them after you've already embroidered.
Not going to lie, this method is quite tricky. It's not as simple as it sounds, and there are certain hidden dangers to be aware of.
But let's get to that later in this post, when we start coloring, okay?
Working the rose
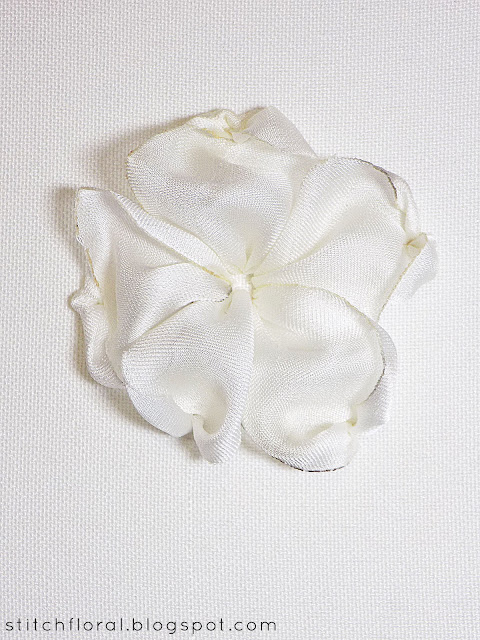
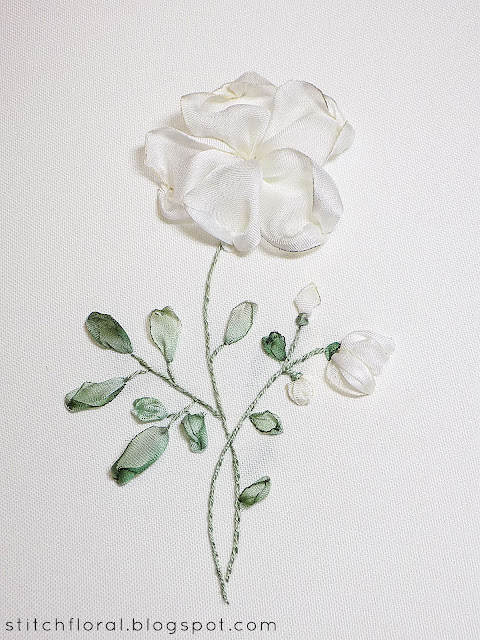
First of all, let's work our flower. I will call it rose, although it is closer to dogrose I think. (by the way, doesn't it remind you Cecelia rose a bit? I might have a type, haha)
The flower can be worked with ribbon stitches (check the basic ribbon stitches post to find out how to work it and this post with information for beginners in ribbon embroidery).
Next, I added few blossoms in the same white ribbon and then worked all the leaves with the ribbons I colored beforehand.
Stems are worked in stem stitch here, using 2 strands of DMC floss.
Frankly speaking, it already looks nice in my opinion. But we can add some extra color to make it brighter :)
Coloring tutorial
So, it is a bit hard to show every step in pictures, because actually there are quite a lot of steps in the coloring. But I will try to explain as well as I can!
First I color the edges.
Important: you don't need to wet your stitches before coloring them, unlike what we did in this post. Because here we have to consider the surface of the fabric. The paint spreads very quickly with water, so if you wet your stitches, water with paint will transfer to the fabric and it will create stains around the stitches.
This is the biggest trouble you can face, but it's really frustrating when that happens, trust me. It totally doesn't look nice.
That's why we must be VERY careful with water when we color already worked ribbon embroidery.
When I start coloring the edges there's very little water on my brush, at least not enough for it to spread to the fabric under the stitches. You can even see white space there.
After waiting for 5-10 minutes you can take just a little water on your brush and try to smear the edges of the paint. Just a little of water will be enough, it spreads really easy!
Now we need to wait for the edges to dry. And while we wait we can color the center of the flower. Here I can be free in my actions because the center is hidden by stitches and even when the fabric there gets stained with color, it won't be visible. But still, we shouldn't use too much water even here. But we can be more bold with color and amount of paint.
When both, center and edges have dried enough, we can color the body of the stitches. I use a fainter paint here, with a tad bit more water so that the color spreads smoother. We still have to be very careful though. Wait till one layer of color dries and then add a bit more on top of it. Sometimes it might take you 3-5 layers of faint paint to achieve a solid color.
For the center you can add beads or french knots or colonial knots, there are many options.
I colored the blossoms the same way and added a bit of color to the bases.
I tried to explain as detailed as I could about the coloring process, but the fact is that it is always better to try it out yourself. My main recommendation is to be extremely careful with water. And use fainter paint for the body of petals.
Don't try to color first time on a serious project, because there is a big chance that you will make mistakes at first with water and might spoil the work. Better make few stitches on a spare piece of fabric and practice with them to develop an intuitive understanding of how the paint and water work.
So, this post marks the end of our ribbon embroidery festival. It was not very long, but fruitful enough. Hope you liked it and got some inspiration to try it yourself! Truly, ribbons are a wonderful material to work with, so make sure to try them out!


No comments
Write what you think! ❤
Note: Only a member of this blog may post a comment.