Time to practice ribbon embroidery! Today we will work an easy forget me nots miniature and apply the stitches we learned in the previous posts. And of course we will add some extra elements in our favorite floss :)
If you're wondering why there's so much stuff about ribbon embroidery on the blog lately, it's because we're having a little ribbon embroidery festival this month!
Well, this week is actually the last one, but I will try to give more tutorials for you in the next few days so that you have enough inspiration and guidance to try it yourself.
Ribbon embroidery is quite easy, so don't hesitate to try it out and broaden your expertise further :)
Before we start with the tutorial here are the posts you might want to read if you are a complete beginner in ribbon embroidery:
Ribbon embroidery for beginners where you can read what materials and tools you need to start as well as how to start and end the ribbon when you are embroidering.
5 basic stitches for ribbon embroidery, we will use the straight stitch and ribbon stitch in this tutorial, in particular, so check this post if you're not familiar with these techniques.
DIY silk ribbons if you want to use silk ribbons like me, but can't source it anywhere in your place of residence. I'm using DIY silk ribbons in this tutorial for the forget me nots and hand-colored satin ribbon for the leaves.
So, now we are ready to go, let's start!
Ribbon forget me nots tutorial
First, we make the flowers. I'm using a technique which is kinda on the border between a straight stitch and looped stitch here. I still refer to it as straight stitches, but the fact stands that we are actually making loops, haha.
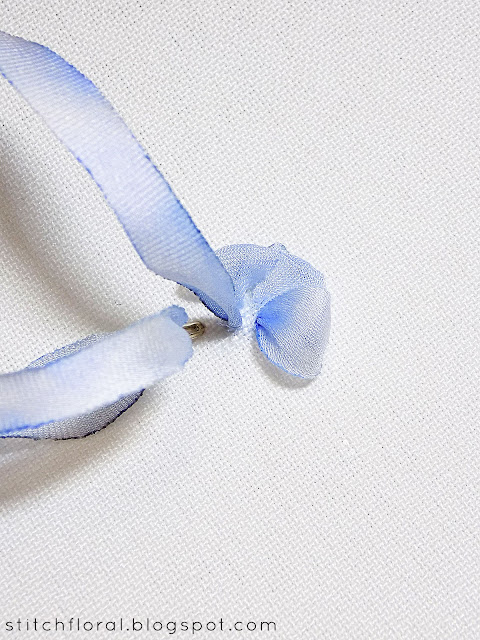
So you start your stitch at the center of the flower and insert the needle approximately halfway where you really want your petal end.
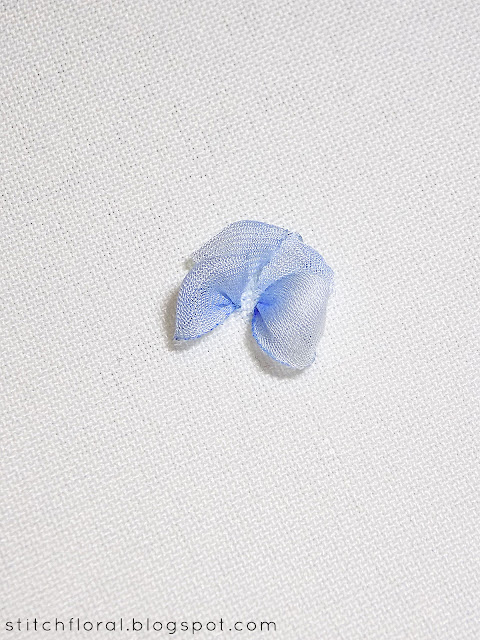
Don't pull the ribbon fully through, leaving it in a looped form on the surface of the fabric. It makes your petal dimensional and quite realistic as the end sort of “hangs in the air”.
Make more flowers like that. 5 petals per flower is fine. Place them closer to each other to avoid white space in between.
You can vary the sizes of the flowers to add more realism and make the ensemble more fun. Also don't worry if your petals start looking a bit to the left or right, or just aren't perfectly the same shape and look. All these imperfections will only benefit the work making it more entertaining to look at.
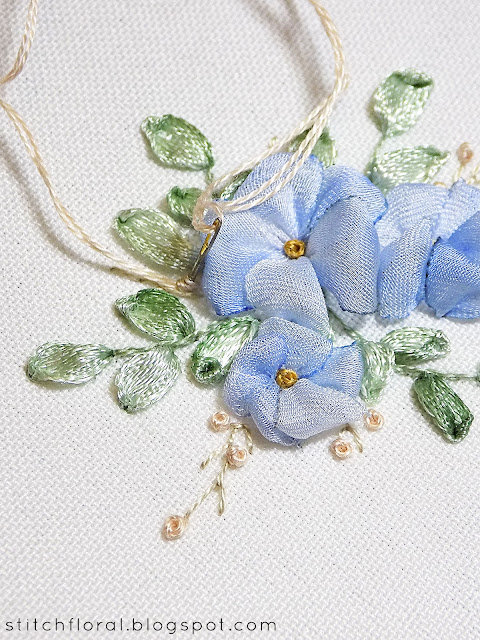
For the stems, you can use any line stitch (I used stem stitch here) in the thread of similar color to the ribbons. Then add the leaves making ribbon stitches on these stems, piercing the ribbon at the top of your stitches.
I also added branches with french knots to make the work a bit more interesting and placed french knots at the centers of the flowers.
The result:
It's actually quite easy and quick to work. Perfect for beginners and doesn't really require a pattern, Just place few flowers close together, surround with leaves and add some extra elements like french knots to complete the look.
So try it out for now and next time let's work something a bit more complicated, shall we?


No comments
Write what you think! ❤
Note: Only a member of this blog may post a comment.