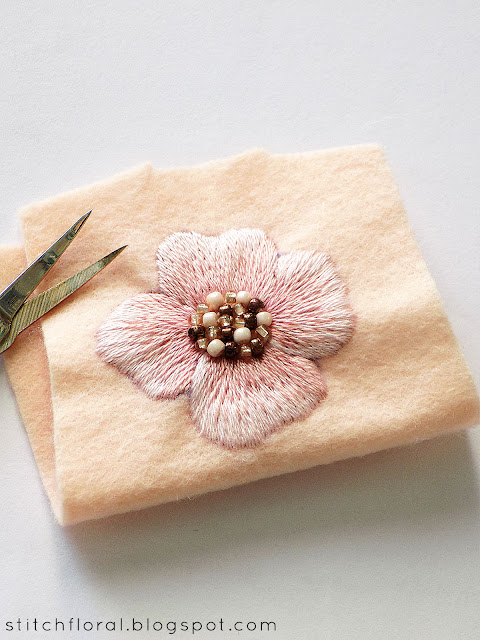
How about learning how to make an embroidered brooch today? It's not difficult at all!
Let me be honest and say that I've been drooling over the embroidered brooches I saw on Pinterest and Instagram for a while now. They really look so pretty! Of course, my mind literally became constipated until I got a clue on how to make one, haha. Now, after a little research and try and fail, let me share this tutorial for you :)
The focus in this tutorial is on how to make a brooch out of your embroidered piece so I will not dive into how to stitch the little flower you see here. Although, really, it's nothing too complicated: 3 rows of long and short stitch on each petal and beads for the center.
Before proceeding, please, be aware that first try might be a fail like it happens very often. My first attempt of a brooch didn't look pretty (I should have taken a picture, but I forgot). So, I would recommend to give yourself some space for failing the first time, to try it on an excess piece of felt and with embroidery that you won't regret spoiling. Also, it would be great to test the materials before you go serious.
Anyway, let's go!
Materials and tools:
- Felt (1mm thick) of the color fitting your embroidery color palette, or contrasting color if you wish,
- Hot glue gun,
- Toothpicks (for gluing in complicated places),
- Brooch pin,
- Sharp scissors (take both: sewing scissors and manicure scissors. To test their “sharpness” try cutting a piece of felt first).
DIY hand embroidered brooch tutorial
Work your embroidery for the brooch on a piece of felt that is twice the size of embroidery.
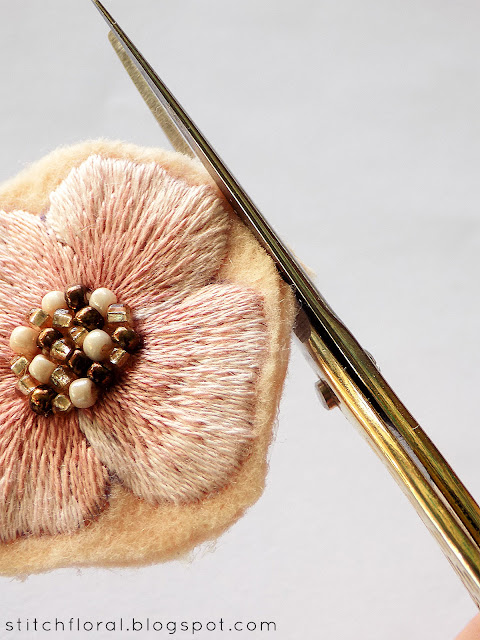
It's needed so that you can fold the felt and cut the shape out (Sorry for the ugly looking scissors, they are mirroring their surroundings 😅).
When you cut the embroidery out, leave generous allowance around the shape. The two cutouts will be the front and the back of the brooch.
Now we need to place and secure the brooch pin on the back of the brooch. Usually, it's better to place the pin between the center and the top of the brooch or it will tilt when wearing.
Of course, guessing blindly is not the way to do that so you can go the following route: use a sewing pin to determine the place of the brooch pin from the front, inserting it through both layers.
On the backside slide the brooch pin down the shaft of the sewing pin you used. Keep it in place holding with your fingers while removing the sewing pin.
Then sew the brooch pin down to the backside. Or you can simply glue it down :)
Now, using the hot glue gun, glue the two sides together. You can spread the glue only on one side and stick them together, it will be enough (I spread the glue only on the backside cutout).
!Attention! The edges must be glued together especially thoroughly. These kinds of openings like on the left picture are not acceptable! Take a toothpick, coat it in glue and slide between the layers, then press them together. Make sure all of the edges are glued together. It's okay even if glue sticks out, you will cut it out later.
Now cut the shape out again. This time the allowance will be 1-2 mm and it will follow the shape of your embroidery closely creating a neat outline.
The DIY brooch is ready!
The front and the back.
It's actually amazing how different it looks depending on the clothing background.
By the way, if you don't like the idea of a felt outline, you can work a close buttonhole stitch around the shape. It will further strengthen the sides together and create a neat edge! :)
Hope this tutorial inspired you to try and make an embroidered brooch yourself!


Thank you, its lovely.
ReplyDeleteThank you :)
DeleteWonderful - and really clear instructions, much appreciated!
ReplyDeleteThank you, Dimitra!
DeleteAs-Salamualaikum lovely brooch❤️
ReplyDeleteWa alaikum salam! Thank you :) ❤
DeleteThankq I love this tutorial looking for a small compliment to my customers
ReplyDeleteAssalamu alaikum, thank you for this helpful tutorial, can you please tell me the name of the fabric you used for this brooch?
ReplyDeleteWhat a great post! What an amazing blog
ReplyDeleteThank you so much <3
The patches designs found in local market or via online stores are usually categorized according to profession, age, gender, sports, numbers, cartoon characters, and popular brand logos. this webs
ReplyDeleteTruly, this article is really one of the very best in the history of articles. I am a antique ’Article’ collector and I sometimes read some new articles if I find them interesting. And I found this one pretty fascinating and it should go into my collection. Very good work! this website
ReplyDeleteThank you!
ReplyDeleteOur Responsive Web Design Services assure you to display properly across all screen sizes and across all browsers. There is no need to fret about whether your users are on the tablet, computer or mobile. We ensure that whichever browser they choose to use on any device, their experience is seamless and fantastic.
ReplyDelete