Stem stitch is probably one of the basic, easiest stitches out there. But there are actually so many aspects to it that can leave a learning stitcher confused. So today we will inspect all of the little details that make up a successful stem stitch, one by one, and I will share ALL the tips that I know with you. Let's go!
Related posts:
1) How to stem stitch
First of all, the basics of working stem stitch.
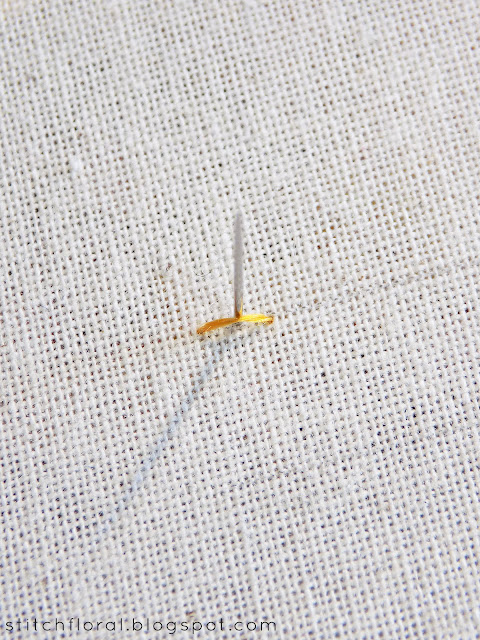
Bring the needle up at the beginning point of the line, make a straight stitch and bring it up again – this time in the middle of the first stitch. Make sure your needle hovers over the working thread.
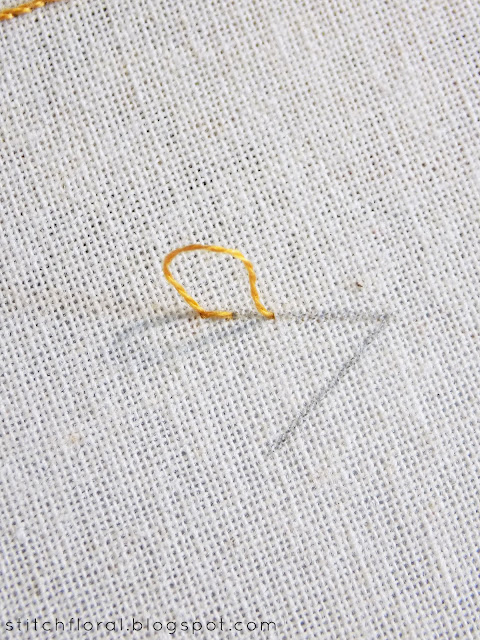
Make another straight stitch.
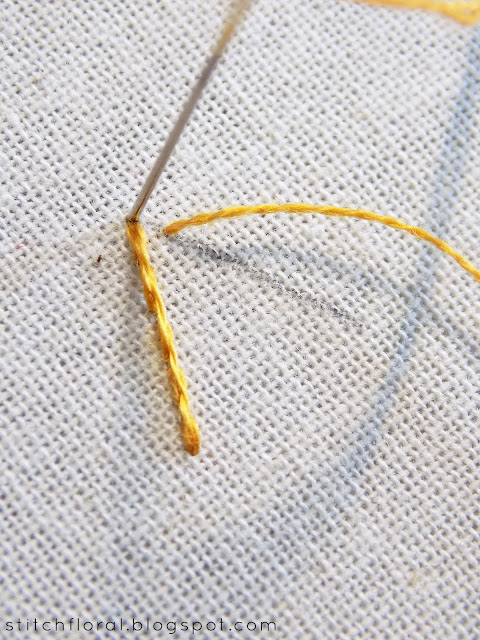
And bring the needle up again at the ending point of the previous stitch. I find it most convenient to do when the thread is not pulled through completely.
I showed the stabbing way of stem stitching (stabbing is when the needle goes up and down through the fabric) but there is a sewing way too when you just scoop a bit of the fabric with your needle not leaving the front side. However, if you're using a hoop or a frame where your fabric is taut, sewing is not the best way to go about it as it can cause puckering.
So here is a stem stitched line. Note how much it resembles a rope – that is a distinguishing feature, although there are also nuances... but we will speak about it a bit later :)
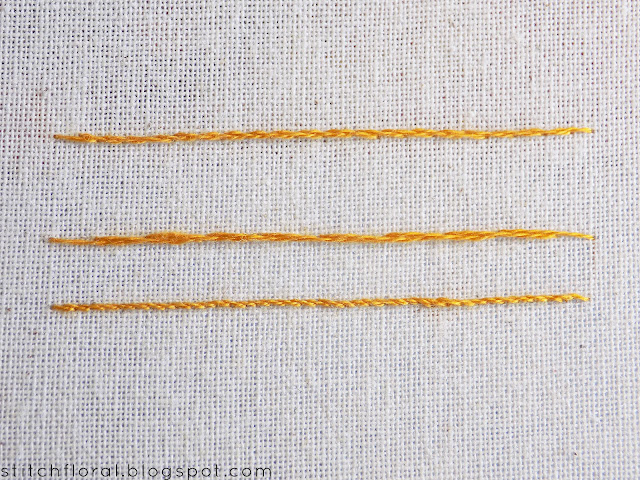
You can vary the look of the line by changing the size of your stitches. In the picture, the top line is worked in moderate size stitches, then large stitches and the bottom one – tiny stitches. Choose whatever you like!
2) Stem stitch VS outline stitch
Now, this topic is quite discussion worthy, at least for me.
So, there is an outline stitch. Which is worked exactly the same way as stem stitch, except that when you stitch from left to right, the needle goes under the working thread.
In the picture above, the top line is the outline stitch and underneath is stem stitch.
As you see, they look quite different. Stem stitch resembles a rope, while outline stitch has a more even look, I call it liana.
Now, what's interesting is... the reason their look is so different is because of the thread's twist. The majority of stranded cotton floss is S twisted (fibers of thread are twisted in a particular direction), while some rayon and silk thread are Z twisted (their fibers are twisted in another direction).
Which means that, if you take Z-twisted thread and work stem stitch – it will actually look like outline stitch. And if you work outline stitch it will look like stem stitch. And rayon and silk thread are very popular among stitchers, so this situation is quite common.
That's why the whole differentiating between stem stitch and outline stitch seems a bit weird to me, to be honest. I see both of the stitches as stem stitch with 2 different ways to work it. I believe it is important to be able to tell them both apart and know the difference. So that if you want to achieve the ropy look you will work it with the needle over the working thread, and if you want your line to be smoother, you will bring the needle up from under the previous stitch.
Actually, in my post 6 faces of stem stitch, I already stated my point of view and also showed a couple more methods of working stem stitch.
In the end, all of us can have our own opinions on the classification. But the important thing is to know what “outline stitch” is in case you meet it in instructions :)
3) Stem stitch directions
Sometimes we have parallel/mirrored elements in our embroidery designs. When I was a beginner I thought it meant that I need to change the way I'm working stem stitch.
Like, if the element on the left is worked with the needle coming up over the stitch, then the mirrored element on the right should be worked with the needle going under the stitch, right? Like, we mirror the way we work it?
Not really. As we already know, the two methods: needle over the stitch and needle under the stitch – give two different looks to the line.
Instead, you keep working all the elements the same way. That will give your design a consistent look.
The only time you change the place of where your needle comes up is when you switch the direction of stitching and start working it from right to left.
A nice way of practicing it is working rectangular shapes. When you do that, you notice that when you work the line from left to right and from right to left, from top to the bottom and from bottom to the top – you also switch where the needle comes from.
You can also practice it by working a circle shape and watching carefully how with the switch of direction, the place where your needle comes from changes too.
I mean it! If you're still confused after looking at the pictures, the best thing is to work a rectangular yourself :)
By the way, speaking of circles, let me give you a quick tip.
4) Completing interrupted stem stitch line
It's not only about circles, actually. Imagine that you are working a line from left to right and the thread finished. Then you switched to some other element and then maybe started the same line but from right to left and a moment would come where you would have to complete the line. I personally have these situations, haha.
So, here's what you shouldn't do:
And this is what you should do:
The needle comes from under the last stitch but goes over the first one in the circle. Seamless! :)
5) Stem stitch corners
And now, let's speak about working corners with stem stitch.
First of all, the classic way of working the corner.
Usually, you finish the stem stitch line there at the last point, so you can't really start a new line from the same point. In this case, just start another line making a straight stitch from the other direction.
And now, the thing that might irk you.
The typical thing for stem stitch lines is that the start and the end of the line might seem too thin compared to the “body” of the line where stitches go side by side and therefore create 2 layers. And that's why we might have these straws sticking out.
Now, this is not always the case! Quite often it is not noticeable. But sometimes it is. Haha. Well, as for me, I'm often satisfied with the simple classic way of starting and ending the line. There are just these situations when these little straws pop up and catch all my attention. If it ever happens to you too, let me tell you how to start and end the line without these straws.
I will show using a corner as an example.
The first stitch you make is half the size of the stitch you plan to use for the line. Meaning, if your usual stitch for the body of the line would be 0,5cm (2 inches), then the first one would be 0,25cm (1 inch). And then you get back to the starting point of the line.
And make a new stitch. As we already agreed, the second stitch would be twice the size of the first one, right?
So you work the rest of the line as usual until you come to the end. And here after you reached the finishing point, you still bring the needle at the end of the previous stitch and make a new one till the finishing line. Again. So, basically, you insert the needle at the starting and ending points of the line twice. Two stitches there and there: one – small, one – usual one.
No straws sticking out. Consistent line with sharp ending points, as if you sliced it.
Going back to the corners, if you use the “classic” way of working a corner here, you will find that you would be unable to repeat the trick to avoid the tails. I mean your needle goes back to the starting point of the line here, so how about the second stitch? Where are you going to start it?
There are different ways to solve it (feeling like we are doing a maths problem). But just as an example:
You can go to the backside, slide the needle under one of the stitches of the first line, and bring the needle up at the corner.
Then you can repeat the trick and get another solid line with nothing sticking out.
Do you see the difference? Frankly speaking, it is probably not something a passerby would notice. That's why I personally take it easy and often let it slide. But if you notice it in your own work then probably it is worth doing the trick for your own satisfaction if not for anyone else, haha.
6) Stem stitch curves
We're almost done! Bear with me through our last topic today.
Curves, curls, spirals, and stem stitch.
Have you ever experienced this?
Looks more like a backside than a front side, right? Well, I exaggerated it a little, but the problem can occur very easily. The only thing I did here is work stem stitch over a spiral with a consistent size of stitches.
Do you already see the solution?
That's right, make the stitches smaller!
The tighter the curve goes, the smaller your stitches become. Even if they have to be reeeeally tiny.
Here is the backside where you can see the difference between the size of the stitches at the beginning and at the end of the spiral.
The front look!
And that's all!
Yeah, as easy as stem stitch may seem, it still holds a lot of secrets.
Congratulations on dealing with this 4 pages worth post, haha. I hope it was helpful and if you still have any questions, you can always slide in the comments section or leave me a message through the contact form. :)


Thank you.
ReplyDeleteYou're welcome :)
DeleteExcellent tutorial! Well explained and very useful. I learn so much from your blog - thank you!
ReplyDeleteThank you, dear :)
DeleteThank you, this was very informative. Now I know what mistake I was doing while working on curves with a stem stitch! 😊
ReplyDeleteThis tutorial is really good! I just started learning embroidery and this was much better than a video! Thanks!
ReplyDeleteVery informative tutorial thank you. :)
ReplyDelete