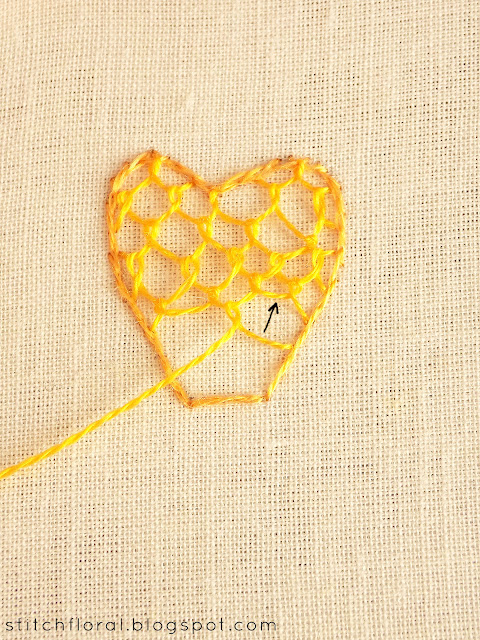
Last time we talked about
detached buttonhole, I showed you the examples worked on squares.
But, let's be real – working perfect squares in your hand
embroidery is quite a rare event. So, today let's see how to apply
this technique for the shapes that are more likely to be used in your
embroidery projects!
While I was thinking of
shapes, a petal and a leaf were what came to my mind instantly. I
actually worked detached buttonhole on similar leaf shapes when I was
stitching the Fall wedding pattern.
Of course, there are lots
of other shapes that will look great with detached buttonhole
filling, but I guess two examples will be enough to get the idea.
Frankly speaking, I don't
know any formula or rule when working detached buttonhole on
irregular shapes, so everything you read in this post is purely the result of my own self-teaching. Maybe there are better and more
convenient ways. Unfortunately, I haven't come across to any
explanation on that, so I will just share what I learned in the
process of my own embroidery adventures.
Let's dive in!
Petal shape
So, what I noticed while
working detached buttonhole is that if a shape is irregular I like
to adjust my rows of loops in a way that they will form an even line
that I can continue from, just like how I would do with a square.
It might be confusing now,
but bear with me! :)
You can see that this
petal shape has two apparent apexes which we can work individually
first. These loops together with the cut in the middle will form an
even line and it will be more convenient to continue buttonhole-ing.
So with the next row, we
make loops on the previous ones above, and then on the outline of the
cut in the middle.
And then just continue
building the “net”. As the shape narrows down and you have to
decrease the number of the loops, my suggestion is to not miss on the
loops like in the picture above.
It will just create a
stray lonely loop.
Well, not like it is completely a “no”.
Actually, you can make various patterns in your buttonhole net
depending on how you anchor the loops. In the case of the picture
above, if you insert the needle at the opposite end from where it
emerged, you will make an opening on both sides. And then you can
finish it up, anchoring the two hanging arcs. It will create a sort
of a pattern and if that's what you're seeking then – great!
Otherwise, to get a
consistent buttonhole net I suggest cutting down on the parts of the
loops at the sides. Just don't acnhor these halved ones, and go
straight for the full loops. Like that you will naturally decrease
the number of loops.
Leaf shape
The principle is the same.
We work the top of the
leaf first: two rows in this case. The first detached buttonhole
stitch leaves us with 2 halved arcs, and after we work the next row
we have one halved, one full, one halved. The full one is what we are
going to use for the next row.
Now we can work a full row
of loops, anchoring the ones on the sides to the outline...
…then anchoring to the full loop we have above, and then continuing to anchor to the
outline.
Continue working detached
buttonhole and when you come to another place of broadening in the
shape, you can work a full row of loops again anchoring them to the
outline and the loops from the previous row.
The end.
Now, do you remember that
we used the outline to anchor our loops in some places? Well, as long
as your outline is the same color as the detached buttonhole, it is
fine. But what if it isn't? What if the outline would be pink or red
and the places where you anchored the loops will stand out?
There are two ways to fix
it:
-Preplanning. If you plan
everything ahead, you can leave tiny stitches underneath the outline
that you can later use for anchoring. It is a bit hard, to tell you
honestly, the whole preplanning thing. Well, alternatively, you can be
using a second threaded needle and timely put tiny stitches where you
need them while you are working the main buttonhole net with the
other needle.
-Secondary outline. You
can have the first simple outline in one strand of floss – any line
stitch will do – and then top it with a more voluminous and
prettier stitch. It will cover up all the places where the loops were
anchored to the first outline.
Finally, one last thing.
The examples above are for working buttonhole from the tops to the
bottom of the shape. But you can actually turn the shape over on its
side and start working buttonhole making the rows parallel to the
side. That's how I worked the leaf shapes in the Fall wedding project. You might find this method more preferable in many
situations!


Thank you for showing this stitch :)
ReplyDeleteYou're welcome :)
Delete