Let's learn a bit of
needle lacing :)
The art of needle lacing
is one of the most fascinating for me. These intricate patterns
created (usually) with fine thread look so fragile but elegant at the
same time. The respect I harbor for the masters of this craft is
humongous! You have to have really great patience and perseverance to
design and produce the masterpieces that they do.
As for me, unfortunately,
I haven't plunged deeply into this art yet. I've practiced only the
two versions and still struggling big time with one of it (you will
see in the pictures below, haha).
Related posts:
However, I felt the need
to share these quick tutorials even if they are not perfect so that
those of you who discover a special interest in this craft, could
practice it and, I'm sure, get much better than me!
Knotted detached buttonhole
This is the one that I
struggle with!
It isn't that complicated
in the steps you have to take to work it. The most complicated for
me, personally, is to keep the tension of thread and the loops
consistent: you can adjust the knot to go a bit higher or lower
according to your preference, which affects the sizes of the loops
making them smaller or bigger, and, accordingly, changes the size and the shape of the arc between the loops.
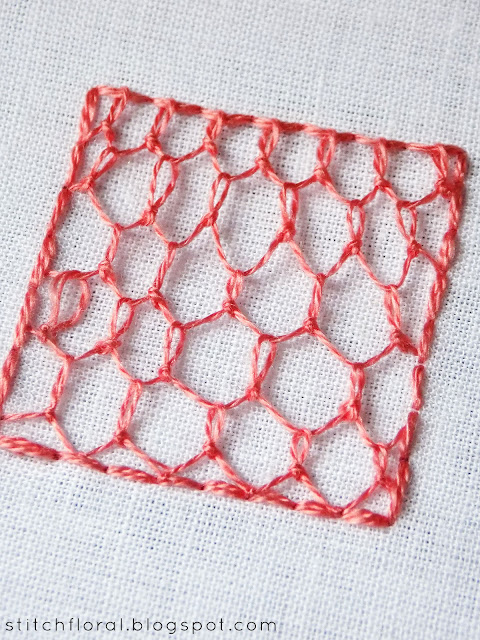
Well, let me show you my
attempts first :)
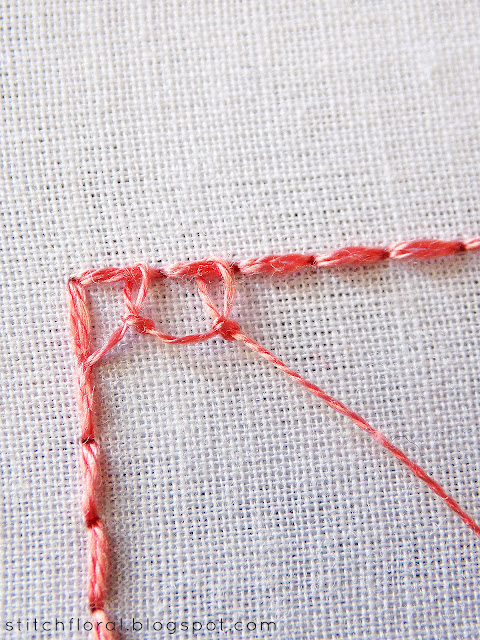
The first step is
identical to the basic detached buttonhole: you slide the needle
under the outline of your shape in the vertically downward direction,
and tuck the working end of the thread under the tip of the needle.
As you pull the thread,
the loop will start forming. At that moment, slide the needle behind
the loop and over the working end of the thread.
Start gently pulling the
thread and see how the knot is forming. At this point, you can usually
adjust where the knot will be paced – a bit higher or lower. It
will decide on the size of the loop and how deep or shallow the arc
between the loops will be.
Your knot should look like
this.
When it comes to the
second row, you can repeat the steps the same way just mirror the
direction from which you slide the needle behind the needle.
Or, you can start the
second row from the same direction as the first one (from left to
right in my case).
It will affect the
appearance of the lace (the direction in which the loops are “looking”
will be the same), but it kind of eats thread and also I don't like
thread stretches that can't be anchored or grounded anywhere, so
that's why I'm reluctant to that, even though appearance-wise it will
probably look neater... well...
Anyway, that's my version
of knotted detached buttonhole. Let me emphasize the fact that it is
“my version” because it looks awkward due to my struggles,
however if you put more practice into it, it will definitely look much
much prettier!
I actually really like the potential of this lace, so hopefully, I will be able to conquer it at
some point!
Double looped detached buttonhole
This one is much easier
and looks really pretty!
Basically, all you need to
do is work the basic detached buttonhole BUT with a special way of
placing the loops. You place 2 loops beside each other (if you're
using back stitch or chain stitch for the outline, then
place 2 loops under one stitch. Then skip some space, and then place
the 2 loops close to one another again.
Look how pretty! And it is
quick enough for you to not start feeling frustrated by a tedious
process. (I do feel that way with the previous variation).
Now, I brought to you 2
variations, but the world of needle lace is much much richer and
there is an abundance of techniques many of which use detached
buttonhole stitch.
There is a vintage
embroidery encyclopedia by Thérèse De Dillmont with free
access to read it online. You can find it in this list here
under the number 18. If you don't like reading it from the Archive,
you can go to this site where
the book is typed in with all the pictures. This chapter on the art of needle lace is what
I would like to bring your attention to. The pictures for each
technique are quite eloquent, so feel free to play with your needle
and thread, and who knows, maybe you will discover a new talent or
passion! :)


Thanks so much Amina. I am trying to do this for a bag and your blog is very helpful.
ReplyDelete