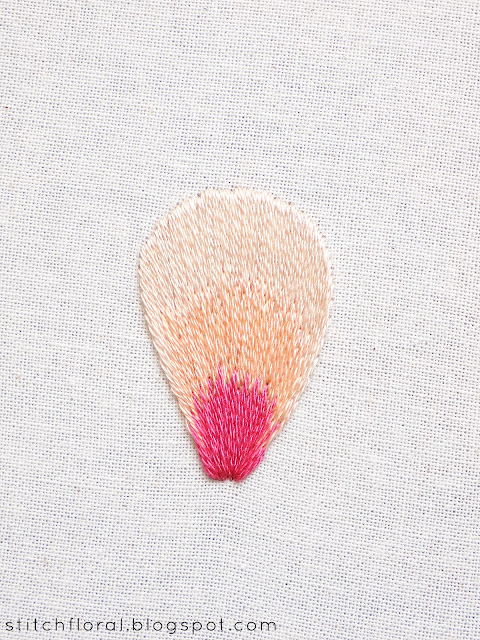
Here's a bit of practice for you to understand better how long and short stitching works and how different approaches to this technique will affect the outcome.
In case you missed, here are previous posts on the topic:
In previous posts, I focused more on the choice of colors: how well еhey blend into each other and how sometimes when the colors you don't expect to work together, actually do.
But this time, I would like to speak more about the technical aspect of long and short stitching.
So, it's not like I have a diploma in this area or something, but through the years of stitching, I think I managed to learn a thing or two. And now that I'm able to compare my current practical knowledge and my initial idea of how long and short stitching works, I suppose there may be some common misconceptions among beginners which are worth discussing.
And what we are going to talk about is the typical illustration for long and short stitch which you can find in many books and other resources. Like this one:
The picture is from this book (pretty useful, by the way, I recommend reading it).
There are loads of pictures which look similar to this one, and all of them share these traits:
- the long stitches are perfectly the same length,
- the short stitches are perfectly the same length
- the difference between long and short stitches is maintained equal throughout the whole needlework.
To put it simply, there are two levels of stitches.
These levels are what I would like to talk about today.
Disclaimer: I'm not criticising these illustrations! God knows, it is hard to reflect in a single illustration what long and short stitching is. I just think there can be misconceptions about what it really looks like and how it works.
So, let's begin our little practice :)
Here are our three cases. Please look at them carefully and try to find differences in them. The 2 and 3 are very alike, I know, but there is still a difference between them.
Case 1
This is an example of when there are only two levels and they are rather close to each other in length. Meaning the difference in between long and short stitches is minimal.
Of course, I couldn't secure perfectly same length for each and every stitch, but more or less, they are all on the same levels.
So what does it give us? Each row of stitches stands quite independently in its shape. You can distinctly see where one color ends and the next starts.
Case 2
This flower petal also has two levels of stitches, like the previous one, but the difference in their length is bigger now.
Here the blending goes better and the shapes of the rows of colors are not as definite as in the previous example.
So, if we reiterate: for the blending to work better the difference in the length of stitches should be a bit higher.
Case 3
Now, this one is a bit more chaotic than the previous two. Here I used approximately 3 levels of long and short stitches.
I'm using the word “approximately” because I wasn't trying to stay precise while stitching. It just goes like this: ”longer stitch, shorter, one a bit longer, this one super long, now a shorter one again, now let's do a super long again”, etc. Chaotic.
And although I tried to mark three levels, the marking is very loose.
Conclusion
To sum up our little practice:
- If you want the color to be distinct in shape, then you can make the difference between long and short stitches smaller.
- If you want the colors to merge more, then you can increase the difference between long and short stitches, making the longer ones longer and the shorter ones shorter.
- That being said, you don't really have to maintain the same level between long and short stitches and make it so orderly, but rather try making your stitching more chaotic, which also helps the colors to dissolve more naturally into each other.
Personal insight: chaotic long and short stitching is what I'm used to. And the second case looks pretty much like the third one because I could barely resist my habit and still inserted here and there stitches between the main two levels. You can see them up close.


No comments
Write what you think! ❤
Note: Only a member of this blog may post a comment.