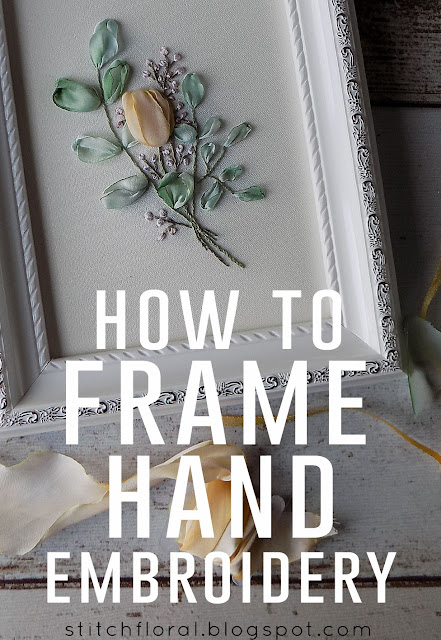
Today let's learn how to frame our hand embroidery works using simple picture frames from a nearby store :)
I already showed how I mount my finished embroidery on art canvases. These canvases are very sturdy and I like how they allow the needlework to really pop up. There is nothing else to steal the attention from your stitches, you only focus on the embroidered surface.
But framing embroidery is just as great of a way to enhance its final look!
The difference is that, as a designer of embroidery patterns, I prefer my work to be the only focus when I show it, so I mount these works on art canvases mostly. But when it comes to something I made just for pleasure and deem is it a nice wall/table decoration, then picture frames come in handy.
You can actually do that at a framing shop if you can allow yourself to spend a penny on a high-quality carcass.
However, even a simple picture frame bought for a few bucks can make it work :)
The frame from today's post, for example, is a plastic one that costs around 4$. There are cheaper options, of course, but when saving money, do it with grace! This one, despite the price and material, is hard to tell apart from the frames I ordered in the local studio (like the one in this post).
That'll probably be my only tip here on how to choose the picture frame because all in all, I believe it is an entirely separate topic for discussion.
How to frame hand embroidery
This post is simplified because I already explained some steps in detail before. So make sure to check the tutorial on how to mount hand embroidery on art canvas before proceeding with this one. Especially when it comes to making “pocket corners” and lacing!
Materials and tools:
- Picture frame
- Cardboard (thickness 1,5mm and more)
- Stationery knife (box cutter)
- Cutting mat
- Needle and sewing thread
The cutting mat is optional. You just will need to cut the cardboard and the mat will help prevent cutting the table surface underneath along the way. If you don't have one, you can use scissors instead of a knife. The edges won't be as even but they will be covered under the frame, so it's not that bad.
Step 1
Disassemble the frame. Depending on the frame, there will be a glass or acrylic protection. I had an acrylic here and threw it away because it's useless for ribbon embroidery. However, no protection means dusting problems, so use yours if your embroidery is not too dimensional! Keep the backing though, that's what we'll need in the next steps.
Step 2
Take the cardboard and cut out a shape the same shape as the backing. If you can, use a box cutter and a cutting mat to ensure even edges.
Step 3
Make sure the sizes are identical. We will mount fabric on the cardboard next, and it will add extra mm to the width. Don't panic, you will still be able to fit it in the frame, just make sure the cutout is not any larger than the actual backing.
Step 4
Place the fabric with your needlework on top of the cardboard. From here on we will follow the same steps as in this tutorial. I will omit some details to not repeat myself, so check it out before reading further.
Step 5
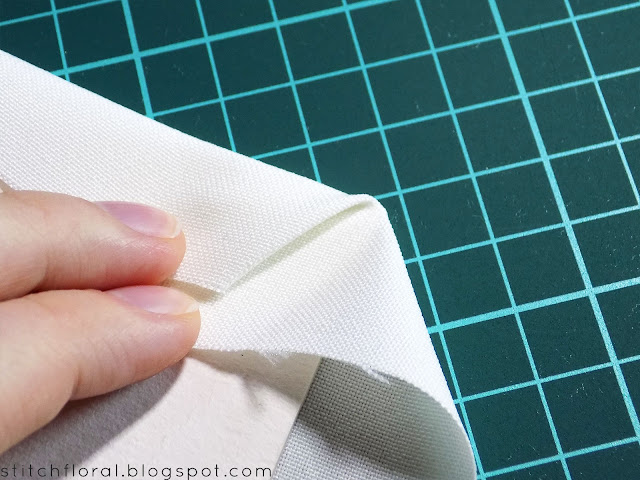
Turn the cardboard cutout together with the fabric over, face down. And fold the corners.
Then fold each of the sides to get diagonal creases. It's okay if they are not perfect, just make them tight enough. And then stitch them together using the invisible stitch.
Step 6
Using a needle and sewing thread start lacing the sides. Make it tight but remember that cardboard can bend so be careful with using your force.
Here's the result from the front and the back:
Step 7
Now it's time to assemble everything together. Take the frame and put it face down. Put the protection inside if you're using it, then the mounted cardboard, then the backing.
And that's all!
This is how to frame hand embroidery. The trickiest part is the corners and lacing, but you will get the gist of it as long as you give it a try! Other than that, it's not a complex process at all given that you have all the materials and tools.
And the framed piece looks 10x lovelier, don't you think?
There is something about ribbon embroidery, I always want it framed prettily and a bit on a luscious side, even though I'm usually up for more minimalistic designs, haha. By the way, if you want to learn how to work this ribbon tulip, here's the tutorial.
I wonder what is your preferred way if framing needlework? Do you leave it bare, mounted on a canvas, or you like adding frames?


Great post... Today, I have learned how to frame hand embroidery works using simple picture frames. Thanks for sharing informative content. I love this.
ReplyDeleteNeedlework Framing
No problem, I'm glad it was helpful :)
DeleteAny clean and care tips for maintenance?
ReplyDeleteIf the needlework is framed and is protected under the glass, you just need to wash it (gentle hand washing) once in several years to keep it fresh.
DeleteIf the needlework is framed without any glass protection, dust it regularly with a clean dry brush. It also needs a more frequent washing (gentle hand washing) but I can't say the exact time period because it may depend on may factors. Just take a look at the work when you dust it. If it looks faded and dull, wash it.
I have posts about washing and ironing embroidery:
https://stitchfloral.blogspot.com/2016/08/how-to-wash-hand-embroidery-with-no.html
https://stitchfloral.blogspot.com/2018/01/4-rules-for-ironing-hand-embroidery-and.html
And in case it puckers after washing:
https://stitchfloral.blogspot.com/2019/08/what-to-do-when-your-fabric-is-puckering.html
Thanku so much🙏
DeleteThanks very helpful !
ReplyDeleteCan we use normal glassed frame? Like normal one we use for poctures
ReplyDeleteYes, the frame that I'm using in this tutorial is a glass photo frame :) I just don't use the glass here because ribbon embroidery is dimensional, it would get jammed
DeleteYes, I am entirely agreed with this article, and I just want say that this article is very helpful and enlightening. I also have some precious piece of concerned info !!!!!!Thanks. click here
ReplyDeleteGreat work Amina. Thank you very much for sharing this great tutorial on framing hand embroidery. Good luck. Thank you.
ReplyDeleteA mind blowing article is provided here. Private tutor Alpine And it is written with great skill and the words directly explain the thought of author.
ReplyDeleteimmensely helpful!! Thank you for this. I am in the midst of this very "search" and you certainly raised some things I hadn't considered.
ReplyDeletesmart led poster
After going over a few of the blog posts on your web page,
ReplyDeleteI honestly like your way of writing a blog. I bookmarked it to my bookmark webpage list and will be checking back soon.
coffee mug with photo printing online