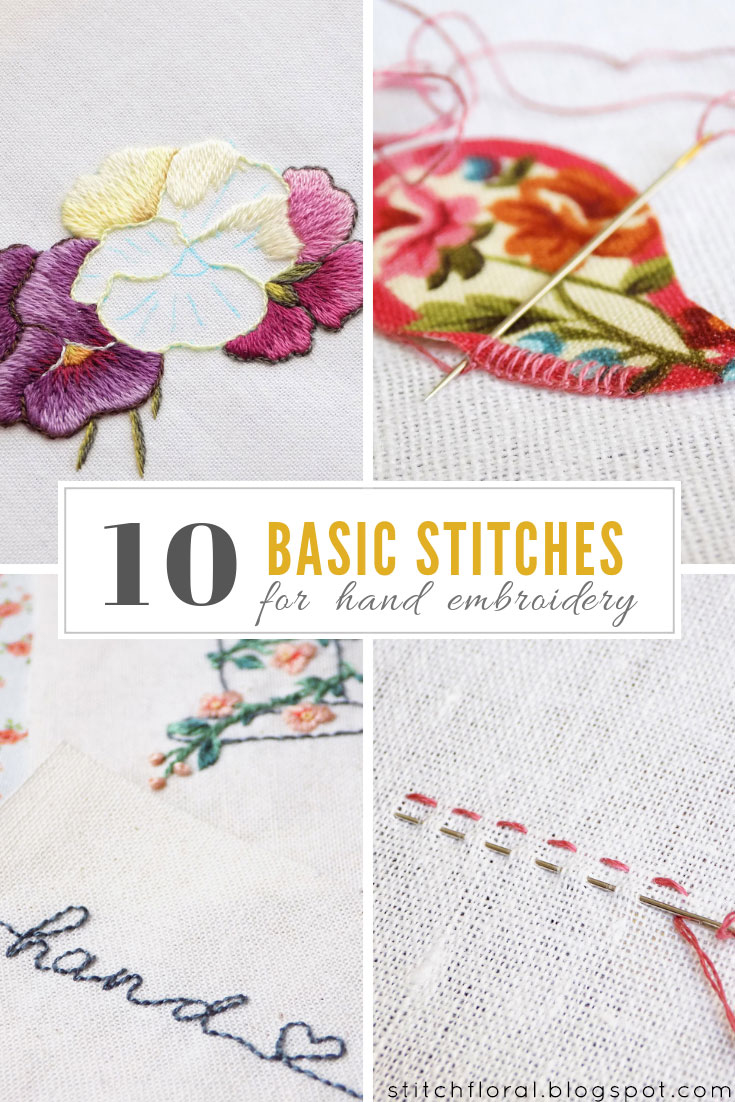
Hand embroidery beginners! This one is for you.
Now, you might already know that there are hundreds of stitches in hand embroidery and dozens of techniques and styles. This craft is really an inexhaustible supply of opportunities and possibilities. So... when you only start hand embroidery it might be a little too overwhelming as to where to start in this sea of stitches.
So here's a compilation of basic stitches that you can practice to kick off your embroidery journey :)
One warning though: this list doesn't have the easiest stitches. It has the essentials which are used in the majority of hand embroidery designs. If you know these stitches, you are equipped to work virtually any pattern that exists out there and you are also prepared for learning other, a bit complicated stitches. So yeah, knowing these stitches = knowing ~60% of hand embroidery.
Click on the names of the stitches to be directed to tutorials!

1. Running stitch
This one is the best and easiest to learn after the simple straight stitch (which is basically bringing the needle up at point A and bringing it down at point B).
This stitch might not look that attractive in its original form, but it is actually a base for many decorative borders and can also be used in patterns as a way of decorative darning. Ever heard of Sashiko? Yes, it's based on running stitch!

2. Stem stitch
Stem stitch is essential when you learn hand embroidery. I would say it is one of the pillars of surface embroidery.
Just as the name suggests, it is often used for working flower stems. But obviously, not only that. You can use stem stitch for any line, be it straight or curvy, and also can use it to fill the shapes.
It is also my recommendation to check out the different faces of stem stitch so that you don't get lost in some variations and even other names for this technique that you can meet later in embroidery world.

3. Back stitch
I think back stitch is currently the rage of hand embroidery, especially when worked in thick thread (with 6 strands of floss in the needle). It is also used for lines and curves, and something you might often meet on Instagram – filling lettering elements.

4. Split stitch
One of my personal favorites for no particular reason :) I just find it extremely handy and versatile and I like using it in my own designs.
It fits the purpose of working lines and it is charmingly dimensional when used as a filler. It also can remind chain stitch in some way, but is much easier to work so can function as a substitute on certain occasions.
Lastly, if you find it difficult to work split stitch, here's split back stitch. It looks identical but is a bit easier to work. It's just that split back stitch is more thread-consuming.

5. Chain stitch
Chain stitch is a key element of zakka embroidery which is very popular nowadays! You've definitely seen these simple but lovely designs on Pinterest, a quirky mixture of Japanese and Scandinavian style. If you don't know, then check it out!
By the way, here are 6 tips for better chain stitch so that you have a powerful start ;)

6. French knots
I consider french knot as one more pillar of hand embroidery. It has so many application possibilities. It can be a tiny flower on its own, or pistils, just a “dot” element or a tool for dimensional filling. Depending on how many strands of floss you're using and how many wraps you make around the needle it will change its size, so it is fun to play with it.

7. Lazy daisy stitch
Lazy daisy is one of the easiest and most versatile stitches out there. It is the basics! Just like you see in the picture above, you can take use lazy daisy to work both leaves and petals of a flower and add stem stitch or any other line stitch for the stem.

8. Buttonhole stitch
This stitch is not one of the easiest, but arguably one of the most purposeful. Working a border (actually there are many variations of buttonhole borders), applique work, filling a shape (leaves and flower shapes especially) and edging: some of the things you can do with this stitch. Working a line is probably the only thing it's not really fit for, haha.

9. Satin stitch
Satin stitch is a method of filling a shape with parallel straight stitches. It looks amazing when done correctly with stitches slanted at the same angle and creates a pretty shiny effect. Also, you can use padding to make satin stitch a bit more dimensional.

10. Long and short stitch
While satin stitch is suitable for filling basically any shape, except that there is a size limitation. When a shape or element is too big it's really hard to keep the stitches perfectly parallel and evenly tensed so long and short stitch comes to your aid. And as a cherry on a cake, long and short stitch also allows you to play with colors creating pretty gradations and gradients. It is also the key part of needlepainting.
Long and short stitch might look difficult and complicated, and yeah, out of all other stitches here, it probably is indeed on another level. But it's possible to learn it and work it even if you are a beginner :)
Now, take a spare piece of fabric, needle, and thread and start your embroidery exercises learning these stitches! You may use the freebies from this blog, some of which have step by step tutorials, so you don't have to puzzle over how to stitch them. For long and short stitch practice check out needlepainting tips and the three stitch alongs. Also, do visit Stitches Library where you can find lots of other stitches and techniques! There is plenty of material for your practice :)


me facina todo estas puntadas los bordados son maravillosos
ReplyDeleteThank you :)
DeleteThank you. Have a nice day :)
Deletetips are very helpful.I found one blog which is similar may be helpful check it:
ReplyDeletehttps://www.showflipper.com/blog/5-Excellent-Hand-Embroidery-Tips-For-Beginners
son muy hermosas esas puntadas ,importante un paso a paso
ReplyDeleteThank you :) Step by step, that's right :)
DeleteIt's going to be ending of mine day, however before finish I am reading this wonderful piece of writing to
ReplyDeleteimprove my experience.
Thank you for reading it ❤ Hope you had sweet dreams :)
DeleteThank you for the nice tutorial. Keep rocking.
ReplyDeleteSerena from Embroidery Digitising
Thank you!
DeleteAmazing artwork! Thank you for this.
ReplyDeletethank you :)
DeleteThank you so much for this! It really helped with my school project.
ReplyDeleteOh, I'm glad it was helpful :)
Delete